Cheesy Beef Stuffed Tortilla Bake — Best 45-Min Ultimate


Cheesy Beef Stuffed Tortilla Bake — Best 45-Min Ultimate
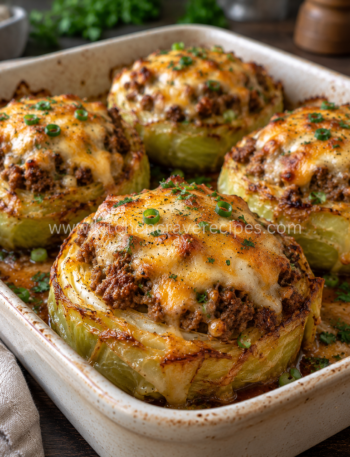
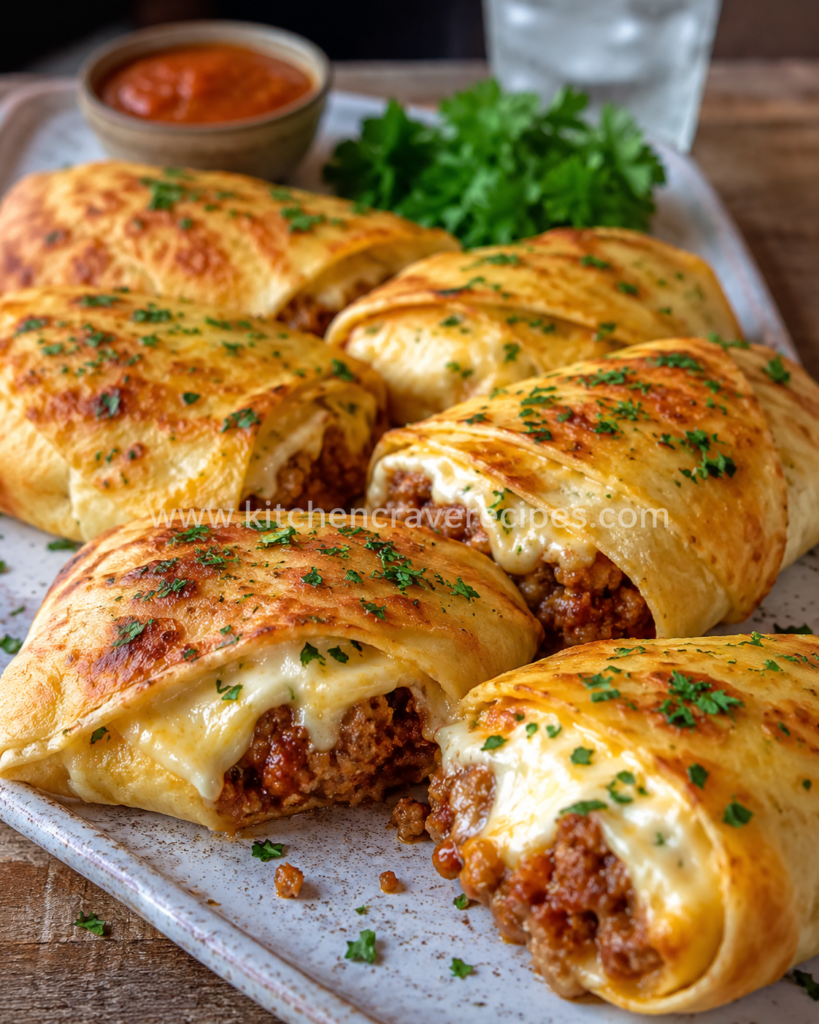
The photo makes the case before a single word of explanation is needed: a white rectangular baking dish packed with plump, golden-baked flour tortilla rolls, their tops bubbling with a mix of melted mozzarella and cheddar, the filling of seasoned ground beef and sauce visible at the open edges, the whole surface scattered with finely chopped fresh parsley. It’s the kind of dinner that makes the table go quiet for a few minutes — not from awkwardness, but because everyone is too busy eating to talk.
This cheesy beef stuffed tortilla bake is a straightforward oven-baked casserole that delivers maximum flavor from a short ingredient list. Seasoned ground beef goes into flour tortillas with cheese, the rolls pack tightly into a baking dish, more cheese goes on top, and the whole thing bakes at 375°F until the exterior tortilla edges are golden and the cheese on top is bubbling and spotted with brown. The result hits every comfort food note — savory, cheesy, slightly crisp at the edges, and completely satisfying.
Recipe Quick Info
| Detail | Info |
|---|---|
| Prep Time | 20 minutes |
| Cook Time | 25 minutes |
| Total Time | 45 minutes |
| Servings | 6 |
| Course | Main Course |
| Cuisine | American-Tex Mex |
| Cooking Method | Baking |
| Calories | ~520 per serving |
| Difficulty | Easy |
Why You’ll Love This Cheesy Beef Stuffed Tortilla Bake
- One baking dish, no fuss — everything assembles in 20 minutes, slides into the oven, and comes out ready to serve directly from the dish with zero transferring or plating theatrics.
- The cheese bakes into a golden, bubbly crust — packing the tortillas tightly in the dish and topping generously with shredded cheese produces that irresistible baked-cheese finish visible in the photo.
- Crowd-sized portions without extra effort — this recipe serves 6 comfortably from a single dish, and scaling to 12 only requires a second baking dish and the same 25-minute bake time.
- Fully customizable heat level — the seasoning blend can be mild enough for kids or amped up with jalapeños and extra chili for adults who want more fire.
- Budget-friendly without tasting like it — ground beef, flour tortillas, and shredded cheese are three of the most cost-effective grocery staples, and the finished dish doesn’t reflect that at all.
- Make-ahead friendly — assemble the entire dish up to 24 hours ahead, cover and refrigerate, then bake directly before dinner with 5 extra minutes added to the total time.
- Leftovers reheat beautifully — unlike many casseroles, the tortillas hold their structure through refrigeration and reheating, keeping each roll distinct rather than dissolving into a soggy mass.
Ingredients
For the Beef Filling
- 1½ lbs ground beef (80/20 for best flavor; drain well after cooking)
- 1 medium yellow onion, finely diced
- 3 cloves garlic, minced
- 1 can (15 oz) tomato sauce
- 2 tablespoons tomato paste
- 1 teaspoon chili powder
- 1 teaspoon ground cumin
- ½ teaspoon smoked paprika
- ½ teaspoon garlic powder
- ½ teaspoon onion powder
- ½ teaspoon kosher salt
- ¼ teaspoon black pepper
- ¼ teaspoon dried oregano
For Assembly
- 6 large flour tortillas (10-inch burrito size)
- 1½ cups shredded mozzarella cheese, divided
- 1 cup shredded cheddar cheese, divided
- ¼ cup sour cream (optional, spread inside each tortilla before filling)
For the Top
- ½ cup shredded mozzarella cheese (for the final cheese layer — this is what melts into the golden, spotted crust shown in the photo)
- ½ cup shredded cheddar cheese
- 3 tablespoons fresh flat-leaf parsley, finely chopped (for garnish, clearly visible in the photo)
Optional Add-Ins
- ½ cup canned black beans, drained and rinsed (fold into the filling)
- ¼ cup pickled jalapeño slices inside each roll (for heat)
- 2 tablespoons diced green chiles from a can (stir into the beef filling)
Substitution Guide
| Original Ingredient | Substitution | Notes |
|---|---|---|
| Ground beef (80/20) | Ground turkey or chicken | Drain less fat; add 1 tsp olive oil to prevent dryness |
| Flour tortillas (10-inch) | Gluten-free flour tortillas | Same size; handle gently as GF tortillas crack more easily |
| Mozzarella cheese | Monterey Jack | Melts identically; slightly milder flavor |
| Cheddar cheese | Pepper jack | Adds heat and color to the top cheese layer |
| Tomato sauce | Enchilada sauce (red) | Gives a more complex, chile-forward flavor profile |
| Sour cream (inside roll) | Cream cheese, softened | Richer and denser; reduces the chance of a wet interior |
Kitchen Tools Needed
- 9×13-inch baking dish — the standard size for fitting 6 large stuffed tortilla rolls snugly side by side; snug packing is what keeps the rolls from unrolling during baking
- Oven — preheated to 375°F; this is the primary cooking tool and must be fully preheated before the dish goes in
- Large skillet (12-inch) — for browning and seasoning the ground beef filling on the stovetop before assembly
- Wooden spoon or spatula — for breaking up and stirring the beef as it cooks
- Aluminum foil — for covering the baking dish during the first phase of baking (keeps the tortillas from drying out before the cheese has melted through)
- Cooking spray or butter — for greasing the baking dish so the bottom tortillas don’t stick
- Spoon or ladle — for portioning the beef filling into each tortilla without overfilling
- Sharp knife and cutting board — for chopping onion, garlic, and parsley
- Instant-read thermometer — to confirm the ground beef filling has reached the USDA-recommended safe internal temperature of 160°F before assembling
Step-by-Step Instructions
Step 1: Preheat the Oven and Prep the Baking Dish
Preheat your oven to 375°F and position the rack in the center of the oven — center placement is standard for casserole-style bakes because it ensures even heat from both the top element and the oven floor, which is what produces that consistent golden cheese top and a properly set interior. Lightly grease a 9×13-inch baking dish with cooking spray or a thin layer of softened butter, making sure to cover the bottom corners where the tortillas sit directly on the dish.
Step 2: Brown and Season the Ground Beef
Heat a 12-inch skillet over medium-high heat. Add the ground beef and break it apart immediately with a wooden spoon, spreading it into an even layer. Cook for 5–6 minutes, stirring every 60–90 seconds, until the beef is fully browned with no pink remaining and has developed some light caramelization in spots — you’ll hear it actively sizzling and see the fat rendering clearly. Drain the excess fat by tilting the skillet and spooning it out, or transfer the beef to a colander briefly.
Step 3: Build the Seasoned Filling
Return the drained beef to the skillet over medium heat. Add the diced onion and minced garlic and stir for 2–3 minutes until the onion has softened and turned translucent. Stir in the tomato paste and cook for 1 minute, stirring constantly — the paste will darken slightly and smell more concentrated as it cooks down. Add the tomato sauce, chili powder, cumin, smoked paprika, garlic powder, onion powder, oregano, salt, and pepper. Stir to combine and reduce the heat to low, simmering for 3–4 minutes until the mixture is thick enough to hold its shape in a spoon without running off. Confirm the beef has reached an internal temperature of 160°F before removing from the heat.
Embedded Tip: The filling must be thick, not saucy, before you roll it into the tortillas. If it looks thin or runny, continue simmering with the lid off for another 2–3 minutes — a wet filling soaks through the tortilla from the inside during baking and produces a soggy roll rather than a firm, sliceable one.
Step 4: Warm the Tortillas and Assemble
Wrap the 6 flour tortillas in a damp paper towel and microwave for 30–45 seconds until pliable and warm. Cold tortillas crack when rolled — warming them is a non-negotiable step for clean, intact rolls. Lay one warmed tortilla flat on your work surface. Spread a thin layer of sour cream across the center (optional), then add approximately ½ cup of the beef filling in a line down the center, leaving 1½ inches clear at the top and bottom edges. Scatter 2 tablespoons of shredded mozzarella and 1 tablespoon of cheddar over the filling.
Step 5: Roll and Pack the Dish
Fold the bottom edge of the tortilla up over the filling, fold in both sides, and roll up snugly — this is the same technique as a burrito, and the tighter the roll, the better the bake holds together. Place the rolled tortilla seam-side down in the prepared baking dish. Repeat with the remaining 5 tortillas, placing each one snugly against the last. The photo shows the rolls packed very tightly side by side in a single layer — this tight arrangement is what prevents the rolls from opening during baking.
Embedded Tip: If any filling extends to the very edge of the tortilla, reduce the amount slightly for the next roll. Overfilled rolls push filling out into the bottom of the dish during baking, which creates a wet pool under the rolls and can cause the bottom to soften excessively.
Step 6: Top with Cheese and Cover for Baking
Scatter the remaining mozzarella and cheddar evenly over the top of all 6 rolls — be generous with coverage, making sure every roll is fully blanketed. Cover the baking dish tightly with aluminum foil. The foil traps steam during the first phase of baking, which heats the filling through and softens the tortilla tops without drying them out or burning the cheese before the interior is hot.
Step 7: Bake Covered, Then Uncovered for the Cheese Crust
Slide the covered dish into the preheated oven and bake for 15 minutes covered. Remove the foil and return the dish to the oven for a final 10 minutes uncovered. During this uncovered phase, the cheese on top will melt completely, begin to bubble at the edges, and develop the golden-spotted, slightly browned finish visible in the photo. The tortilla edges that peek above the cheese will turn a deep golden color. Do not open the oven door during the covered phase — doing so releases steam and extends the time needed to heat the filling through.
Step 8: Rest, Garnish, and Serve
Remove the baking dish from the oven and let the cheesy beef stuffed tortilla bake rest for 5 minutes before serving. This brief rest allows the filling and cheese to set slightly so that each roll lifts out of the dish cleanly rather than falling apart. Scatter the fresh chopped parsley generously over the top — the green against the golden cheese is the visual cue that the dish is ready, exactly as shown in the photo. Serve directly from the baking dish with sour cream, salsa, or hot sauce alongside.
Pro Tips for a Perfect Baked Tortilla Casserole
Baking tip — always remove the foil for the final 10 minutes. The two-phase baking approach (covered, then uncovered) is specifically designed for a dish like this where the filling needs to heat through before the cheese has a chance to over-brown. If you skip the uncovered phase entirely, the cheese will be melted but pale — you’ll miss the golden, spotted crust that makes the dish visually and texturally complete.
Drain the beef thoroughly — don’t rush this step. Excess fat from 80/20 ground beef doesn’t just affect flavor; it makes the filling wet and causes the tortilla bottoms to become greasy and soft during baking. Drain as completely as possible after browning, and press with a folded paper towel over the skillet surface if needed to remove the last of the rendered fat.
Pack the rolls tightly in the dish. A loosely arranged baking dish allows the rolls to unravel as the tortillas puff slightly during baking. Six 10-inch tortilla rolls fit exactly across a 9×13-inch dish when packed snugly, and that snugness is structural — each roll holds the next one in place.
Rest before serving — this isn’t optional. Five minutes of rest after the dish comes out of the oven allows the molten cheese layer to firm from liquid to a cohesive layer that holds together when you lift individual rolls. Serving immediately causes the cheese to flow freely and the rolls to slide apart. Patience here pays directly into a cleaner serving experience.
Common Mistakes to Avoid
1. Opening the oven door during the covered baking phase (baking-specific mistake).
The foil traps steam that heats the filling and softens the tortilla surface. Opening the door during the first 15 minutes releases that steam and adds 3–5 minutes to the required baking time. Set the timer and trust the process — check only when the timer signals, not before.
2. Using wet or under-reduced filling.
A runny beef filling is the single most common reason this dish disappoints. Reduce the seasoned meat sauce until it holds its shape on a spoon before rolling. If you can tilt the spoon and the filling slides off in a liquid stream, it needs more time on the heat.
3. Skipping the tortilla warming step.
Cold tortillas crack along the fold lines when rolled, which creates gaps that allow filling to leak out into the baking dish during cooking. 30–45 seconds in the microwave wrapped in a damp paper towel is the difference between cracked, leaky rolls and smooth, intact ones.
4. Underfilling or overfilling the rolls.
Too little filling produces a disproportionate tortilla-to-filling ratio that tastes bland in every bite. Too much filling prevents the rolls from closing properly and pushes filling into the bottom of the dish. About ½ cup of filling per 10-inch tortilla is calibrated for full flavor and clean rolling.
5. Not covering the dish for the first phase.
Baking uncovered the entire time causes the tortilla tops and cheese to brown before the filling heats through. The covered phase is what ensures the center of every roll is piping hot when the cheese finishes browning in the final 10 minutes.
6. Using pre-shredded bagged cheese exclusively.
Bagged shredded cheese is coated with anti-caking starch that reduces melt quality. The top cheese layer in this recipe benefits significantly from freshly grated cheese — it melts smoother, pools more evenly, and develops better browning in the uncovered baking phase. Bagged cheese works as a convenience, but block-grated is noticeably better for the top layer.
7. Not greasing the baking dish.
The bottom tortillas sit directly on the dish surface and will stick without a grease layer, especially where any filling has leaked. Grease the dish generously — cooking spray or butter both work — all the way to the corners.
Variations
Healthy / Lighter Version
Use 93% lean ground turkey instead of beef and reduce the cheese topping to 1 cup total (½ cup mozzarella, ½ cup reduced-fat cheddar). Add 1 cup of finely diced zucchini and ½ cup of black beans to the filling for volume, fiber, and nutrients without adding significant calories. Each serving drops to approximately 390 calories with the same satisfying portion size. Use the same baking method, temperature, and timing with no adjustments.
Vegetarian Version
Replace the ground beef entirely with a combination of 1 cup cooked brown lentils and 2 cups finely diced and fully sautéed mushrooms. The mushrooms must be cooked until all moisture has evaporated before adding the tomato sauce — this prevents a watery filling. Season identically to the beef version. The assembled dish bakes at the same temperature and time, and the filling holds its shape similarly to the beef original when properly reduced.
Spicy Version
Add 1 teaspoon of cayenne pepper and 1 tablespoon of chipotle in adobo sauce (finely chopped) to the beef filling during the seasoning step. Place 4–5 pickled jalapeño slices inside each roll before rolling, and swap the cheddar topping for pepper jack cheese. The heat level is moderate to hot — serve with a cooling sour cream and avocado topping to give guests control over the spice balance.
Gluten-Free Version
Swap the standard flour tortillas for certified gluten-free flour tortillas (widely available in most grocery stores). Handle them gently — gluten-free tortillas are more prone to cracking even when warmed, so add 15 extra seconds to the microwave warming step and roll with less pressure. Verify that your canned tomato sauce and seasoning blends are labeled gluten-free. All other ingredients in this recipe are naturally gluten-free without modification.
Low-Carb / Keto Version
Standard flour tortillas are not keto-compatible. Replace with large almond-flour or coconut-flour tortillas (sold in most health food stores and online). These tortillas are smaller in diameter, so adjust the filling to approximately ⅓ cup per roll and reduce the total rolls to 5. Note that almond-flour tortillas brown faster during the uncovered baking phase — check at the 7-minute mark rather than the full 10. Net carbs drop to approximately 8g per serving with this swap.
What to Serve With This Cheesy Beef Stuffed Tortilla Bake
- Sour cream and fresh salsa — the classic pairing; the acidity of the salsa and the cool creaminess of the sour cream balance the richness of the baked cheese perfectly.
- Garlic Herb Butter Lobster Tails — Best 25-Min Foolproof — a bright, creamy, slightly charred corn side that mirrors the Tex-Mex flavor profile and adds freshness to the plate.
- Guacamole and tortilla chips — serve alongside as a starter while the bake is in the oven for a complete Tex-Mex spread with zero extra cooking required.
- Simple iceberg lettuce wedge with lime dressing — the crunch and freshness of iceberg provides textural contrast to the soft, cheesy bake.
- Mexican-style rice — a neutral, slightly tomato-flavored rice that absorbs the cheesy filling beautifully when spooned alongside.
- Refried beans — a traditional companion that rounds out the Tex-Mex profile and adds fiber and protein without any additional cooking.
- Sliced avocado with lime and salt — cool, creamy, and rich in a different way than the cheese, avocado slices alongside the bake add freshness and healthy fat.
- Hot sauce selection — set out a few options (Cholula, Tapatio, Tabasco) so guests can customize the heat level of their own serving.
Storage Instructions
Refrigerator
Store leftover rolls in the baking dish covered tightly with plastic wrap or foil, or transfer to an airtight container, for up to 3 days. The tortillas hold their structure well through refrigeration — unlike many casseroles, each roll remains distinct and sliceable rather than merging into a single mass. Store any fresh garnish separately and add only at serving time.
Freezer
The assembled, unbaked dish can be frozen for up to 2 months. Cover the assembled (but unbaked) dish tightly with a double layer of plastic wrap, then foil. Thaw overnight in the refrigerator and bake as directed — add 5 extra minutes to the covered baking phase to account for the cold start. Baked and cooled rolls can also be frozen individually for up to 1 month; wrap each roll in plastic wrap and place in a zip-top freezer bag.
Shelf Life Summary
| Storage Method | Duration |
|---|---|
| Refrigerator (baked, covered) | Up to 3 days |
| Freezer (unbaked, assembled) | Up to 2 months |
| Freezer (baked, individually wrapped) | Up to 1 month |
Reheating Instructions
Oven (Best for Crust Texture): Preheat to 350°F and place the rolls in an oven-safe dish. Cover with foil and heat for 12–15 minutes until the filling is warmed through and the cheese is fluid again. Remove the foil for the last 3 minutes to re-crisp the cheese top. This method best restores the original baked texture and is the recommended approach for a proper second-day serving.
Microwave (Fastest): Place one or two rolls on a microwave-safe plate and cover with a damp paper towel. Heat on 70% power for 90 seconds, check the center temperature, and continue in 30-second increments. The tortilla exterior will be soft rather than crisp using this method, but the filling heats evenly.
Stovetop: Place rolls in a non-stick skillet over medium-low heat with 2 tablespoons of water. Cover with a lid and heat for 5–6 minutes, turning once, until warmed through. The steam from the water warms the interior while the pan lightly re-crisps the bottom edge.
For all reheating methods, the FDA recommends reheated ground beef dishes reach an internal temperature of 165°F before serving.
Nutrition Facts (Per Serving — 1 Stuffed Tortilla Roll)
| Nutrient | Amount |
|---|---|
| Calories | ~520 kcal |
| Total Fat | 26g |
| Saturated Fat | 12g |
| Cholesterol | 90mg |
| Sodium | 820mg |
| Total Carbohydrates | 38g |
| Dietary Fiber | 2g |
| Total Sugars | 4g |
| Protein | 32g |
| Calcium | 310mg |
Nutrition Disclaimer: All values are estimates based on the listed ingredients, 80/20 ground beef, and standard-sized 10-inch flour tortillas calculated using a nutrition reference database. Actual values will vary depending on the specific brands of tortillas, cheese, and tomato sauce used, the fat content of the beef after draining, and any optional add-ins. For precise dietary tracking, calculate using your exact ingredients and quantities in a verified nutrition tool.
Frequently Asked Questions
Can I use corn tortillas instead of flour tortillas?
Corn tortillas are smaller (typically 6-inch) and more prone to cracking when rolled with a full filling. If you prefer corn tortillas, use them to make an enchilada-style version — layer them in the dish rather than rolling, alternating with filling and cheese — instead of the rolled format shown in the photo. The same baking temperature and two-phase method apply, but the result is a layered casserole rather than individual rolls.
How do I keep the rolls from unraveling during baking?
Two things work together: rolling tightly and placing seam-side down. The seam-down positioning is gravity’s assist — the weight of the filling holds the seam against the dish bottom. Packing the rolls snugly against each other provides lateral support so each roll holds the ones beside it in place throughout the bake.
Can I assemble this the night before?
Yes — this is one of the best make-ahead casseroles for this reason. Assemble completely through Step 6 (before baking), cover tightly with plastic wrap, and refrigerate for up to 24 hours. Bake directly from the refrigerator with the foil on, adding 5 extra minutes to the covered phase to account for the cold start. Remove foil and finish for the standard 10-minute uncovered phase.
What’s the difference between baking covered versus uncovered for the whole time?
Covered baking traps steam that heats the filling through and keeps the tortillas from drying on top before the interior is fully hot. Uncovered baking allows surface moisture to evaporate, which is what lets the cheese develop browning and the tortilla edges to crisp. This two-phase approach gives you the benefit of both: a fully heated interior and a properly browned, bubbly cheese top.
Can I add rice to the filling?
Yes. Add ½ cup of cooked white or brown rice to the beef filling when you stir in the tomato sauce. Cooked rice absorbs the tomato flavor as it simmers and helps the filling hold its shape even better inside the roll. It also stretches the filling to comfortably serve 8 portions rather than 6. Do not use uncooked rice — it won’t cook through inside the tortilla during the 25-minute bake.
What cheese melts the best on top?
Low-moisture mozzarella produces the smoothest, most cohesive melt and develops brown spots without burning quickly. The combination of mozzarella and cheddar visible in the photo gives you both the smooth melt (from the mozzarella) and the sharper flavor and deeper orange color (from the cheddar). Pepper jack is an excellent substitute for cheddar if you want heat and color.
How do I know when the bake is done?
Visual cues are reliable for this recipe: the cheese on top should be completely melted, bubbling at the edges where it meets the dish, and have developed golden-brown spots across the surface. The tortilla edges peeking above the cheese should look deep golden rather than pale. If you press the center of the dish gently with the back of a spoon, it should feel firm and hot rather than cool or jiggly.
Can I double this recipe?
Yes. Use two 9×13-inch baking dishes and prepare two batches of filling. Bake both dishes simultaneously on the center and lower-middle rack, rotating positions once at the midpoint of the covered phase. Everything else — temperature, timing, and method — remains identical. Both dishes will hold 6 rolls each for a total of 12 servings.
Is this dish kid-friendly?
Very. The flavor profile is mild by default — chili powder and cumin at the listed quantities produce a warm, savory flavor rather than heat. For children who are sensitive to any spice, reduce the chili powder to ½ teaspoon and omit the smoked paprika. The cheesy, familiar format of a tortilla roll is one of the most reliably accepted dinner formats for kids of almost any age.
Why is my cheese not browning on top?
Two possible reasons: the foil was left on too long into the uncovered phase, or the oven temperature is running lower than the dial indicates. Remove the foil at exactly the 15-minute mark and ensure the oven has fully preheated. If the cheese still looks pale after 10 minutes uncovered, switch the oven to broil on LOW for 90 seconds — watch it every 30 seconds to prevent burning.
Expert Chef Tips
Warm every tortilla before rolling, no exceptions. Even 30 seconds makes the difference between a tortilla that rolls cleanly and one that cracks at the fold. Room-temperature tortillas are better than cold ones, but briefly microwaved tortillas are better than either. This is the step that most home cooks skip and then wonder why their rolls look ragged.
Season the filling aggressively before rolling. Once the filling is inside the tortilla and buried under cheese, you can’t taste or adjust it. The filling should taste slightly more seasoned than you’d want it on its own — the tortilla and cheese temper the intensity during baking, and the finished bite will taste balanced rather than over-spiced. Under-seasoned filling produces a bland casserole regardless of how much cheese you put on top.
Spoon a thin layer of tomato sauce on the bottom of the dish before placing the rolls. This simple step (2–3 tablespoons spread across the greased bottom) prevents the base of the rolls from drying out and sticking during the covered baking phase. It also creates a slight saucy layer under each roll that adds moisture to the bottom edge of the tortilla and contributes to a cleaner lift when serving.
Use a serrated knife for serving. The baked tortilla exterior has a slight crispness after the uncovered phase, and the filling inside is dense. A sharp serrated knife cuts through both cleanly without compressing the roll. A flat chef’s knife tends to push the filling sideways rather than cutting through it, which can push rolls apart during serving.
Recipe Summary
This cheesy beef stuffed tortilla bake is a baked casserole of 6 large flour tortillas, each filled with a thick, well-seasoned ground beef and tomato filling and shredded mozzarella-cheddar, rolled tightly seam-side down in a greased 9×13-inch dish, topped with a generous cheese layer, and baked at 375°F in two phases — 15 minutes covered to heat through, then 10 minutes uncovered to develop the golden, bubbly cheese crust. The whole dish assembles in 20 minutes and bakes in 25, making it a reliable 45-minute family dinner with minimal active effort. Rested for 5 minutes and finished with fresh parsley, it serves 6 directly from the dish.
Conclusion
Some dinners earn their place in the weekly rotation not because they’re complicated, but because they deliver exactly what everyone at the table wants without requiring a culinary production to get there. This cheesy beef stuffed tortilla bake is that recipe — savory, satisfying, visually impressive, and completely repeatable on a weeknight with groceries you likely already have. Make it once and it’ll have a permanent spot in your dinner lineup. The hardest part is waiting the 5 minutes before you dig in.
Cheesy Beef Stuffed Tortilla Bake — Best 45-Min Ultimate
Description
The photo makes the case before a single word of explanation is needed: a white rectangular baking dish packed with plump, golden-baked flour tortilla rolls, their tops bubbling with a mix of melted mozzarella and cheddar, the filling of seasoned ground beef and sauce visible at the open edges, the whole surface scattered with finely chopped fresh parsley. It's the kind of dinner that makes the table go quiet for a few minutes — not from awkwardness, but because everyone is too busy eating to talk.
Ingredients
Instructions
-
Step-by-Step Instructions
-
Step 1: Preheat the Oven and Prep the Baking Dish
-
Preheat your oven to 375°F and position the rack in the center of the oven — center placement is standard for casserole-style bakes because it ensures even heat from both the top element and the oven floor, which is what produces that consistent golden cheese top and a properly set interior. Lightly grease a 9×13-inch baking dish with cooking spray or a thin layer of softened butter, making sure to cover the bottom corners where the tortillas sit directly on the dish.
-
Step 2: Brown and Season the Ground Beef
-
Heat a 12-inch skillet over medium-high heat. Add the ground beef and break it apart immediately with a wooden spoon, spreading it into an even layer. Cook for 5–6 minutes, stirring every 60–90 seconds, until the beef is fully browned with no pink remaining and has developed some light caramelization in spots — you'll hear it actively sizzling and see the fat rendering clearly. Drain the excess fat by tilting the skillet and spooning it out, or transfer the beef to a colander briefly.
-
Step 3: Build the Seasoned Filling
-
Return the drained beef to the skillet over medium heat. Add the diced onion and minced garlic and stir for 2–3 minutes until the onion has softened and turned translucent. Stir in the tomato paste and cook for 1 minute, stirring constantly — the paste will darken slightly and smell more concentrated as it cooks down. Add the tomato sauce, chili powder, cumin, smoked paprika, garlic powder, onion powder, oregano, salt, and pepper. Stir to combine and reduce the heat to low, simmering for 3–4 minutes until the mixture is thick enough to hold its shape in a spoon without running off. Confirm the beef has reached an internal temperature of 160°F before removing from the heat.
-
Embedded Tip: The filling must be thick, not saucy, before you roll it into the tortillas. If it looks thin or runny, continue simmering with the lid off for another 2–3 minutes — a wet filling soaks through the tortilla from the inside during baking and produces a soggy roll rather than a firm, sliceable one.
-
Step 4: Warm the Tortillas and Assemble
-
Wrap the 6 flour tortillas in a damp paper towel and microwave for 30–45 seconds until pliable and warm. Cold tortillas crack when rolled — warming them is a non-negotiable step for clean, intact rolls. Lay one warmed tortilla flat on your work surface. Spread a thin layer of sour cream across the center (optional), then add approximately ½ cup of the beef filling in a line down the center, leaving 1½ inches clear at the top and bottom edges. Scatter 2 tablespoons of shredded mozzarella and 1 tablespoon of cheddar over the filling.
-
Step 5: Roll and Pack the Dish
-
Fold the bottom edge of the tortilla up over the filling, fold in both sides, and roll up snugly — this is the same technique as a burrito, and the tighter the roll, the better the bake holds together. Place the rolled tortilla seam-side down in the prepared baking dish. Repeat with the remaining 5 tortillas, placing each one snugly against the last. The photo shows the rolls packed very tightly side by side in a single layer — this tight arrangement is what prevents the rolls from opening during baking.
-
Embedded Tip: If any filling extends to the very edge of the tortilla, reduce the amount slightly for the next roll. Overfilled rolls push filling out into the bottom of the dish during baking, which creates a wet pool under the rolls and can cause the bottom to soften excessively.
-
Step 6: Top with Cheese and Cover for Baking
-
Scatter the remaining mozzarella and cheddar evenly over the top of all 6 rolls — be generous with coverage, making sure every roll is fully blanketed. Cover the baking dish tightly with aluminum foil. The foil traps steam during the first phase of baking, which heats the filling through and softens the tortilla tops without drying them out or burning the cheese before the interior is hot.
-
Step 7: Bake Covered, Then Uncovered for the Cheese Crust
-
Slide the covered dish into the preheated oven and bake for 15 minutes covered. Remove the foil and return the dish to the oven for a final 10 minutes uncovered. During this uncovered phase, the cheese on top will melt completely, begin to bubble at the edges, and develop the golden-spotted, slightly browned finish visible in the photo. The tortilla edges that peek above the cheese will turn a deep golden color. Do not open the oven door during the covered phase — doing so releases steam and extends the time needed to heat the filling through.
-
Step 8: Rest, Garnish, and Serve
-
Remove the baking dish from the oven and let the cheesy beef stuffed tortilla bake rest for 5 minutes before serving. This brief rest allows the filling and cheese to set slightly so that each roll lifts out of the dish cleanly rather than falling apart. Scatter the fresh chopped parsley generously over the top — the green against the golden cheese is the visual cue that the dish is ready, exactly as shown in the photo. Serve directly from the baking dish with sour cream, salsa, or hot sauce alongside.
Nutrition Facts
Servings 6
- Amount Per Serving
- Calories 520kcal
- % Daily Value *
- Total Fat 26g40%
- Saturated Fat 12g60%
- Protein 32g64%
* Percent Daily Values are based on a 2,000 calorie diet. Your daily value may be higher or lower depending on your calorie needs.