Cheesy Garlic Bread Bake – Easy 5-Ingredient Recipe


Cheesy Garlic Bread Bake – Easy 5-Ingredient Foolproof Recipe
This oven-baked version comes together in just 30 minutes — crispy edges, gooey cheese, and perfect as a quick side for pasta night.
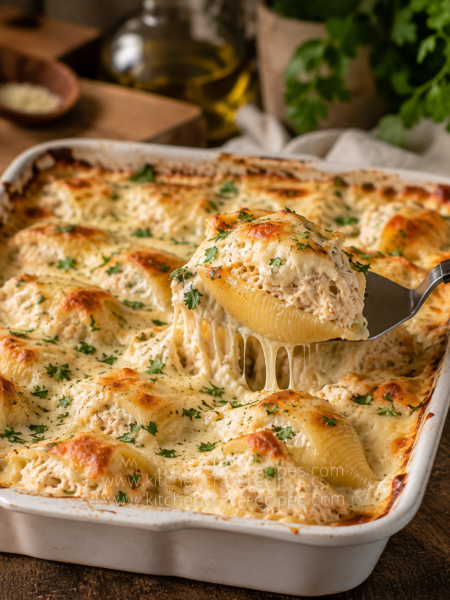
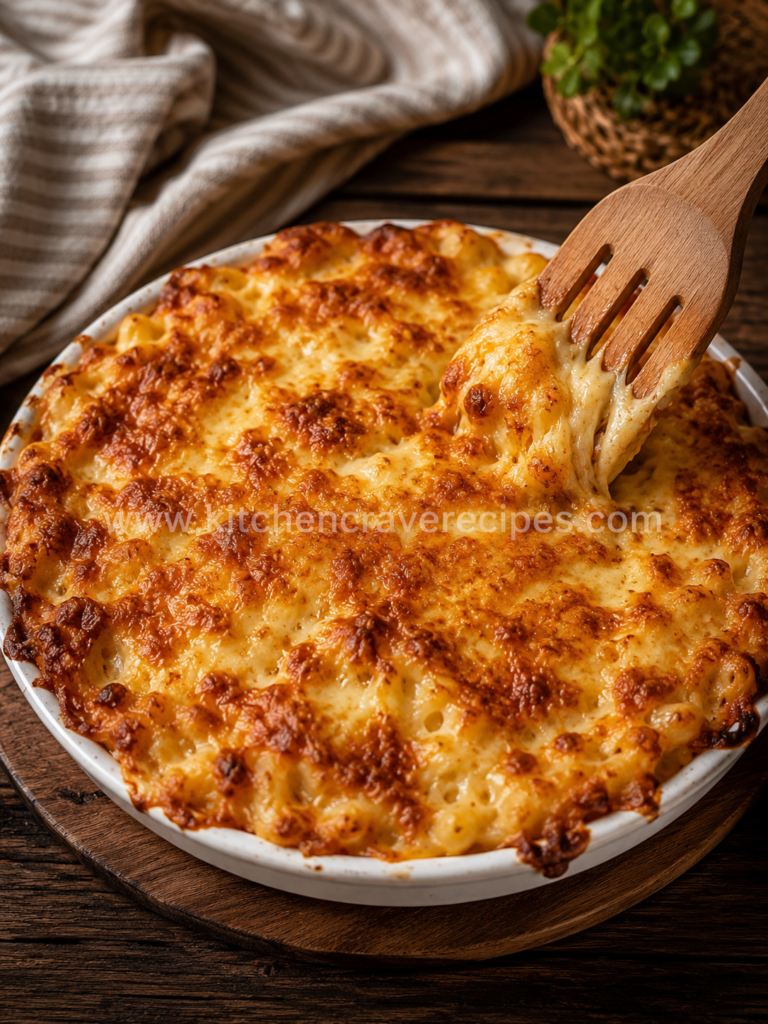
Pull this cheesy garlic bread bake out of the oven and you’ll immediately understand why it disappears before anything else on the table. The photo tells you exactly what you’re working toward: a deep, round white baking dish filled edge to edge with a bubbling, deeply golden cheese crust — blistered in patches of rich amber and ivory, with a wooden spatula already lifting a corner to reveal the soft, garlicky layer underneath.
This is not a slice of garlic bread sitting next to dinner. It’s a full baked dish — layers of garlic-buttered bread pieces bound together under a blanket of mozzarella and Parmesan that bake into one cohesive, pull-apart, crackling-topped slab. The oven’s dry, surrounding heat is what creates that extraordinary surface — cheese browning and tightening from every direction at once, producing the kind of crust that crackles when the spatula hits it.
Five ingredients. One dish. Thirty minutes. That’s the whole deal.
Recipe Quick Info
| Detail | Info |
|---|---|
| Prep Time | 10 minutes |
| Cook Time | 20 minutes |
| Total Time | 30 minutes |
| Servings | 6 |
| Cuisine | American |
| Course | Side Dish / Appetizer |
| Cooking Method | Baking |
| Calories | ~290 per serving |
| Difficulty | Easy |
Why You’ll Love This Recipe
- Bakes in one dish with zero fuss. Everything goes into a single round baking dish, straight into the oven — no multiple pans, no special equipment beyond what you already own.
- That cheese crust is genuinely extraordinary. Mozzarella and Parmesan baked together at high heat create a blistered, crackling golden top that holds together in satisfying pull-apart pieces — exactly like the photo shows.
- Only 5 core ingredients. Bread, butter, garlic, mozzarella, and Parmesan — nothing that requires a trip to a specialty store or any advance planning.
- Ready in 30 minutes start to finish. Ten minutes of assembly and twenty minutes in a hot oven produce a side dish that looks and tastes far more involved than it actually is.
- Endlessly adaptable. Keep it classic or add herbs, spice, or different cheeses — the base recipe is a reliable foundation that welcomes variations without falling apart.
- Feeds a crowd straight from the dish. Served in the round baking dish it baked in, this has an inviting, shareable, pull-apart quality that makes it ideal for gatherings.
Ingredients
For the Bread Base
- 1 large loaf Italian or French bread (about 16 oz), cut into 1-inch cubes
- 4 tablespoons unsalted butter, melted
- 4 garlic cloves, finely minced
- ½ teaspoon kosher salt
- ½ teaspoon dried Italian seasoning
For the Cheese Topping (as shown in photo)
- 1½ cups shredded low-moisture whole-milk mozzarella
- ½ cup finely grated Parmesan cheese
Binder (holds the bake together)
- 2 tablespoons heavy cream or half-and-half (drizzled over before baking)
Optional Add-Ins
- ¼ teaspoon crushed red pepper flakes (stirred into the garlic butter)
- 1 tablespoon fresh flat-leaf parsley, chopped (scattered over after baking)
- 2 tablespoons cream cheese, softened (blended into the garlic butter for extra richness)
Substitution Guide
| Original Ingredient | Substitution | Notes |
|---|---|---|
| Italian bread | Sourdough or ciabatta | Both produce a chewier, more structured bite |
| Unsalted butter | Olive oil | Use 3 tablespoons; flavor is lighter and fruitier |
| Whole-milk mozzarella | Part-skim mozzarella | Melts similarly; slightly less rich |
| Parmesan | Pecorino Romano | Saltier and sharper — reduce added salt slightly |
| Heavy cream | Whole milk | Works fine; the bake is slightly less rich |
| Fresh garlic | 1½ teaspoons garlic paste | Distributes more evenly throughout the bread cubes |
Kitchen Tools Needed
- 9-inch or 10-inch round oven-safe baking dish (ceramic or stoneware, as shown in the photo — the round shape produces even heat distribution and the distinctive edge-to-edge cheese crust)
- Oven (preheat to 400°F)
- Rimmed baking sheet (to catch any cheese drips from the dish during baking)
- Large mixing bowl
- Pastry brush or spoon (for the garlic butter)
- Box grater or microplane (for fresh-grating the Parmesan)
- Wooden spatula or serving spoon
- Measuring cups and spoons
How to Bake a Perfect Cheesy Garlic Bread Bake Every Time
Step 1: Preheat and Prep the Dish
Preheat your oven to 400°F and set a rimmed baking sheet on the center rack to heat along with the oven — placing the baking dish on a hot sheet pan amplifies bottom heat and helps the underside of the bread cubes crisp during baking rather than sitting soft. Lightly butter the inside of your round baking dish to prevent sticking along the edges where the cheese contacts the ceramic.
Step 2: Make the Garlic Butter
In a small bowl, stir the melted butter with the minced garlic, salt, and Italian seasoning until combined. Let this mixture sit for 2 minutes before using — the brief rest allows the raw garlic to mellow slightly in the warm butter and begin releasing its aromatic oils, which will coat every bread cube more effectively than using it immediately.
Step 3: Toss the Bread Cubes
Add the bread cubes to a large mixing bowl and pour the garlic butter over them. Toss firmly until every cube is evenly coated — use your hands if needed to ensure the butter reaches the cut faces, not just the crust. Drizzle the heavy cream over the tossed bread and toss once more; this small amount of fat helps bind the cubes together into the cohesive bake you see in the photo rather than baking up as separate, dry pieces.
💡 Embedded Tip: Day-old bread absorbs the garlic butter more evenly and holds its structure better during baking than fresh-from-the-bag bread. If your loaf is very fresh, spread the cubes on a baking sheet and dry them in the 400°F oven for 4–5 minutes before tossing with the butter — this step takes the moisture level to where day-old bread would naturally be.
Step 4: Pack the Dish and Add the Cheese
Transfer the garlic-buttered bread cubes into the prepared round baking dish, pressing them down gently so the surface is relatively flat and the cubes are snugly packed — you want contact between the bread and the cheese layer above it, not gaps that trap air. Combine the shredded mozzarella and grated Parmesan in a bowl, toss to mix, then distribute the cheese blend evenly across the entire top of the bread, covering it completely edge to edge, just as you see in the photo.
💡 Embedded Tip: Mixing mozzarella and Parmesan before topping serves a specific purpose: mozzarella provides the stretchy, melty pull while Parmesan provides the proteins that brown and blister under oven heat. Combined, they produce exactly the two-tone golden-and-ivory blistered crust visible in the photo that neither cheese achieves as well on its own.
Step 5: Bake to Golden, Blistered Perfection
Slide the baking dish onto the preheated baking sheet on the center rack. Bake at 400°F for 18–22 minutes, until the cheese is completely melted, bubbling actively across the full surface, and showing deep golden-brown blistering in patches — the color you can see in the photo, ranging from pale ivory to deep amber at the most exposed points. The edges of the dish should be showing cheese that has set and crisped against the ceramic sides.
Doneness is entirely a visual cue for this recipe: when the blistering covers roughly two-thirds of the surface and the edges are a deep golden brown, pull it from the oven. Don’t wait for every spot to be uniformly brown — some lighter patches between the blisters are characteristic of this style of bake, not a sign it needs more time.
Step 6: Rest Briefly, Then Serve
Remove the cheesy garlic bread bake from the oven and let it rest in the dish for 3–4 minutes. This brief pause allows the cheese layer to set slightly from an actively molten state to a more cohesive, sliceable one — a spatula pressed against it immediately out of the oven will cause it to slide off in sheets rather than lifting cleanly. After resting, use a wooden spatula or wide serving spoon to scoop and serve directly from the dish.
Pro Tips for the Best Cheesy Garlic Bread Bake
- Baking method tip — use the center rack, not the top. Placing the dish too high causes the cheese surface to overbrown and potentially burn before the bread below it has had time to warm through. The center rack allows the oven’s ambient heat to work on both the top (browning the cheese) and the bottom (crisping the bread) simultaneously and evenly.
- Grate your Parmesan from a block, not a green can. Pre-grated shelf-stable Parmesan has a dry, powdery texture that doesn’t melt into the cheese crust — it sits on top in clumps. Freshly grated Parmesan from a block melts directly into the mozzarella and produces the smooth, blistered surface you see in the photo.
- Don’t crowd the cheese too thick in one spot. Distribute the cheese in an even layer rather than mounding it toward the center — uneven distribution causes the center to stay pale while the thinner edges over-brown.
- Use whole-milk mozzarella, not fresh. Fresh mozzarella (the kind packed in water) releases significant moisture during baking and can turn the bread layer soggy before the top has a chance to brown. Low-moisture whole-milk mozzarella — the kind sold shredded in bags or in block form — is the right choice for a dry, blistered baked crust.
- Serve it straight from the baking dish. The round ceramic dish retains heat for several minutes after coming out of the oven, keeping the cheese soft and gooey for the first few servings — which is exactly how this dish is meant to be eaten.
Common Mistakes to Avoid
1. Using fresh mozzarella instead of low-moisture.
Fresh mozzarella contains up to 60% water, which steams out during baking and makes the bread layer soft and wet rather than golden and structured. Always use low-moisture whole-milk shredded mozzarella for this bake.
2. Placing the dish on the top rack. (Baking method-specific)
The top rack concentrates radiant heat from the oven’s upper element directly onto the cheese surface. At 400°F, this causes the mozzarella and Parmesan to brown too fast — going from perfectly blistered to burned in under 3 minutes — before the bread below is warm and crisped. Always use the center rack for balanced, even baking.
3. Not packing the bread cubes firmly enough.
Loose, airy bread cubes in the dish create pockets where the cheese sinks between them rather than forming a cohesive top layer. Press the cubes into a compact, relatively flat layer before adding the cheese so the surface is even and the cheese has something solid to rest and melt against.
4. Using pre-shredded mozzarella with heavy anti-caking coating.
Some bagged shredded mozzarella brands use more cellulose coating than others, which resists melting and leaves a grainy texture on the surface. Buy a block of whole-milk mozzarella and shred it yourself for the cleanest melt and the most even blistering.
5. Skipping the heavy cream binder.
Two tablespoons of heavy cream seems like a negligible addition, but it’s the ingredient that turns a pile of cheese-covered bread cubes into a cohesive, sliceable bake. Without it, the cubes remain individual and the whole dish lacks the unified texture that makes this recipe so satisfying to serve.
6. Cutting into it straight from the oven.
Active cheese at 400°F is fully molten and will slide completely off the bread layer if you try to serve it immediately. The 3–4 minute rest isn’t optional — it’s what allows the cheese to transition from liquid-hot to the slightly set, cohesive layer that holds together on the spatula.
7. Using garlic powder instead of fresh garlic without adjusting.
Garlic powder can work (use ¾ teaspoon in place of 4 cloves), but it distributes differently — it can settle unevenly in the butter and create concentrated bitter pockets. If using garlic powder, whisk it into the butter thoroughly and let it hydrate for 3 full minutes before tossing with the bread.
Variations
Healthy
Swap Italian bread for a whole-grain sourdough and use olive oil in place of butter — olive oil has a more favorable fat profile and still coats the bread cubes thoroughly for a good bake. Reduce the mozzarella to 1 cup and use part-skim, then add 2 tablespoons of nutritional yeast to the cheese blend for extra savory depth without added saturated fat.
Spicy
Add 1 teaspoon of crushed red pepper flakes and ½ teaspoon of cayenne to the garlic butter before tossing with the bread cubes. Swap half the mozzarella for shredded Pepper Jack, which adds both heat and excellent melting quality. The spice level builds gradually as you eat — mild at first, with a warm finish that works beautifully against the richness of the cheese.
Gluten-Free
Use a certified gluten-free artisan-style bread loaf (widely available at most grocery chains) in exact equal measure for the Italian bread — cut it into 1-inch cubes the same way. The baking time may need 2–3 extra minutes since gluten-free bread tends to have a slightly denser crumb that takes longer to warm through. All other ingredients in this recipe are naturally gluten-free.
Low-Carb / Keto
Replace the bread entirely with 3 cups of cauliflower florets, cut into bite-size pieces and roasted at 425°F for 15 minutes first to remove excess moisture and develop some browning. Toss the pre-roasted cauliflower with the garlic butter, pack into the baking dish, top with the full cheese blend, and bake at 400°F for 15 minutes until bubbling and golden. This is a genuinely different dish in texture but delivers the same garlic-cheese flavor profile with a fraction of the carbs.
What to Serve With This Cheesy Garlic Bread Bake
- Tomato soup or roasted red pepper soup — the gold standard pairing; the bread bake tears apart perfectly for dipping into a warm, acidic soup.
- Pasta with marinara or Bolognese — a natural combination; serve the bake as the bread course and skip the separate garlic bread entirely. Try Best Slow Cooker Beef Roast – 5-Ingredient Recipe as the perfect partner.
- Caesar salad — the cool, crisp, lemony salad cuts through the rich cheese and garlic beautifully.
- Beef or chicken stew — the bread bake doubles as a built-in sopping vehicle for any thick, brothy stew.
- Baked ziti or lasagna — serving two baked dishes together sounds like a lot, but this is genuinely how this recipe performs best at larger gatherings.
- A simple antipasto board — olives, cured meats, roasted peppers, and this cheesy garlic bread bake warm from the oven makes an effortless, crowd-pleasing appetizer spread. Check out Best Slow Cooker Beef Roast – 5-Ingredient Recipe for easy assembly tips.
- Creamy potato soup — another thick soup that pairs as naturally with garlic bread as tomato does, especially in cooler months.
Storage Instructions
Refrigerator
Allow the cheesy garlic bread bake to cool completely before covering the baking dish tightly with plastic wrap or foil. Refrigerate for up to 3 days. The cheese layer will firm considerably once cold but softens back to a pleasant texture when reheated properly.
Freezer
This dish freezes best before baking rather than after. Assemble fully — bread cubes, garlic butter, cheese — then cover tightly with two layers of plastic wrap and freeze for up to 1 month. Bake directly from frozen at 375°F for 30–35 minutes, adding 10–15 minutes to the standard bake time. Fully baked and frozen leftovers are acceptable but the bread texture suffers more than the unbaked version on reheating.
Shelf Life Summary
| Storage Method | Duration |
|---|---|
| Room temperature (covered) | Up to 2 hours |
| Refrigerator (airtight) | Up to 3 days |
| Freezer (unbaked, assembled) | Up to 1 month |
Reheating Instructions
Oven
Preheat to 350°F. Cover the baking dish loosely with foil and heat for 12–15 minutes until the cheese is soft and the bread is warmed through. Remove the foil for the final 3 minutes to allow the cheese surface to re-crisp slightly — it won’t fully return to its original blistered state, but it will warm into a pleasant, melty layer.
Microwave
Transfer a single portion to a microwave-safe plate. Heat on medium power (70%) for 45–60 seconds, checking at the 45-second mark. The cheese will melt back to a soft, gooey consistency but won’t develop any browning. Acceptable for a quick lunch; not ideal if texture matters.
Stovetop
Place individual portions in a dry non-stick skillet over medium-low heat. Cover with a lid and warm for 3–4 minutes until the cheese softens and the bottom of the bread begins to re-crisp lightly against the pan. This method produces the best reheated texture short of the oven.
For safe food handling guidance on storing and reheating dairy-rich dishes, refer to the USDA Food Safety and Inspection Service leftovers resource.
Nutrition Facts
| Nutrient | Per Serving (approx.) |
|---|---|
| Calories | ~290 |
| Total Fat | 16g |
| Saturated Fat | 9g |
| Protein | 12g |
| Total Carbohydrates | 27g |
| Dietary Fiber | 1g |
| Sugars | 2g |
| Sodium | 490mg |
Nutrition Disclaimer: All nutrition values are estimates calculated using standard ingredient databases and will vary depending on specific brands, exact portion sizes, and any substitutions made. These figures are for general informational purposes only and are not a substitute for advice from a registered dietitian or healthcare professional.
Frequently Asked Questions
What’s the difference between this cheesy garlic bread bake and regular garlic bread?
Regular garlic bread is sliced bread spread with garlic butter and toasted — one layer, crisp surface, individual slices. This bake is a full dish of garlic-buttered bread cubes packed together and topped with a thick cheese crust that bakes into a cohesive, pull-apart slab. The texture and richness are fundamentally different.
Can I make this cheesy garlic bread bake ahead of time?
Yes — assemble the dish completely (bread cubes tossed with garlic butter, cheese on top), cover tightly with plastic wrap, and refrigerate for up to 24 hours before baking. Remove from the refrigerator 20 minutes before baking to take the chill off, then bake as directed. Cold dish-to-oven transitions can cause ceramic baking dishes to crack if the temperature shift is too abrupt.
Why does the photo show such uneven browning on the cheese?
That uneven blistering — patches of deep amber next to lighter ivory — is the correct, desirable result of baking mozzarella and Parmesan together in a dry oven. The proteins in both cheeses brown at slightly different rates depending on thickness, contact with the bread, and moisture content. Uniform golden browning would indicate a broiler finish, not a standard bake.
What baking dish size works best for this recipe?
A 9-inch or 10-inch round ceramic or stoneware baking dish is ideal — it produces the edge-to-edge cheese crust you see in the photo. A 9×9-inch square pan works as a substitute. Avoid glass baking dishes if possible; glass doesn’t retain or distribute heat as evenly as ceramic and tends to produce paler, softer results.
Can I use pre-shredded mozzarella from a bag?
You can, but choose a brand with minimal anti-caking coating — look for one that lists only mozzarella and powdered cellulose on the label, without additional starches. Better yet, buy a block of whole-milk low-moisture mozzarella and shred it yourself for the cleanest melt and most even blistering across the surface.
Does this recipe work with sourdough bread?
Yes — sourdough is actually a great choice. Its firmer, chewier crumb holds up better to the garlic butter toss and produces a slightly more structured bite in the finished bake. The mild tang of sourdough also complements the richness of the cheese in an interesting way. Cut it into the same 1-inch cubes as directed.
Can I add protein to make this a main dish?
Absolutely. Stir ½ cup of finely diced cooked chicken or crumbled cooked Italian sausage into the bread cubes before packing them into the dish. Keep the protein pieces small so they nestle between the bread cubes rather than sitting on top and lifting the cheese layer unevenly.
How do I prevent the cheese from sticking to the sides of the baking dish?
Butter the interior of the ceramic dish lightly before adding the bread cubes — this creates a thin fat layer between the cheese and the ceramic that prevents the crust from fusing to the sides and making serving difficult. A thin coat of cooking spray also works.
Is baking the only method that works for this dish, or can I use an air fryer?
Baking in a conventional oven is the right method here — the ambient heat surrounds the dish from all sides and produces the even, edge-to-edge cheese crust in the photo. An air fryer’s concentrated fan-driven heat works on much smaller portions and would require a small oven-safe ramekin; the cheese browns faster but the bread underneath may not warm evenly. Adjust air fryer time to 8–10 minutes at 375°F for a single-serving ramekin version.
What’s the best way to serve this at a party?
Set the baking dish directly on a trivet or folded kitchen towel in the center of the table with a wide wooden spatula alongside it. The dish retains heat for several minutes after baking, and the pull-apart nature of the bake makes self-service intuitive — guests scoop directly from the dish, which creates a natural, shareable, informal energy at the table.
Expert Chef Tips
- Use a ceramic or stoneware dish, not metal. Ceramic distributes heat gradually and evenly, which is ideal for a dish where you want the bread to warm through and the cheese to melt uniformly without scorching. Metal baking pans conduct heat more aggressively and can cause the edges and bottom to over-crisp before the center is fully hot.
- Add the Parmesan in two stages. Mix half into the mozzarella for the main topping, then scatter the remaining quarter-cup of Parmesan over the very top as a final layer before baking. The exposed Parmesan on top browns fastest and most deeply, creating the most visually striking blistered patches — exactly the dark amber spots you see dominating the surface in the photo.
- Season the bread cubes, not just the butter. A light pinch of salt and a small grind of black pepper directly on the cubed bread before adding the garlic butter builds more complex, layered flavor than seasoning only through the butter. The seasoning on the cut faces of the bread interacts with the garlic butter differently than seasoning dissolved in fat.
- Let minced garlic sit in warm butter for 2 full minutes before tossing. This infusion period does something a quick toss cannot — it allows the garlic’s sulfur compounds to begin dissolving into the fat, which distributes garlic flavor far more evenly across every bread cube rather than concentrating it only where the garlic pieces land.
- Don’t skip the rimmed baking sheet under the dish. Cheese bubbles vigorously at 400°F and frequently drips over the edge of even a deep dish onto the oven floor, where it burns and smokes. The baking sheet catches every drip cleanly and also conducts additional bottom heat to the dish during baking, which benefits the underside texture of the bread.
Recipe Summary
This cheesy garlic bread bake is a simple, baked casserole of garlic-buttered Italian bread cubes topped with a blend of shredded mozzarella and Parmesan, baked in a round ceramic dish at 400°F for 18–22 minutes until the cheese forms a deeply golden, blistered crust from edge to edge. Five ingredients, one dish, and 30 total minutes produce a side dish with a cohesive, pull-apart structure that far outperforms regular garlic bread for gatherings. The center-rack baking position and fresh-grated cheese are the two details that make the biggest difference in the finished result.
Conclusion
Some recipes earn a permanent place in your cooking life not because they’re complicated or impressive in a technical sense, but because they’re reliably, genuinely better than what everyone expects. This cheesy garlic bread bake is that kind of recipe — five ingredients, a single dish, and a golden blistered cheese crust that people remember long after the meal is over. Make it once for a weeknight dinner and you’ll be asked to bring it to every gathering that follows. Happy baking.
Cheesy Garlic Bread Bake – Easy 5-Ingredient Recipe
Description
Pull this cheesy garlic bread bake out of the oven and you'll immediately understand why it disappears before anything else on the table. The photo tells you exactly what you're working toward: a deep, round white baking dish filled edge to edge with a bubbling, deeply golden cheese crust — blistered in patches of rich amber and ivory, with a wooden spatula already lifting a corner to reveal the soft, garlicky layer underneath.
Ingredients
Instructions
-
How to Bake a Perfect Cheesy Garlic Bread Bake Every Time
-
Step 1: Preheat and Prep the Dish
-
Preheat your oven to 400°F and set a rimmed baking sheet on the center rack to heat along with the oven — placing the baking dish on a hot sheet pan amplifies bottom heat and helps the underside of the bread cubes crisp during baking rather than sitting soft. Lightly butter the inside of your round baking dish to prevent sticking along the edges where the cheese contacts the ceramic.
-
Step 2: Make the Garlic Butter
-
In a small bowl, stir the melted butter with the minced garlic, salt, and Italian seasoning until combined. Let this mixture sit for 2 minutes before using — the brief rest allows the raw garlic to mellow slightly in the warm butter and begin releasing its aromatic oils, which will coat every bread cube more effectively than using it immediately.
-
Step 3: Toss the Bread Cubes
-
Add the bread cubes to a large mixing bowl and pour the garlic butter over them. Toss firmly until every cube is evenly coated — use your hands if needed to ensure the butter reaches the cut faces, not just the crust. Drizzle the heavy cream over the tossed bread and toss once more; this small amount of fat helps bind the cubes together into the cohesive bake you see in the photo rather than baking up as separate, dry pieces.
-
💡 Embedded Tip: Day-old bread absorbs the garlic butter more evenly and holds its structure better during baking than fresh-from-the-bag bread. If your loaf is very fresh, spread the cubes on a baking sheet and dry them in the 400°F oven for 4–5 minutes before tossing with the butter — this step takes the moisture level to where day-old bread would naturally be.
-
Step 4: Pack the Dish and Add the Cheese
-
Transfer the garlic-buttered bread cubes into the prepared round baking dish, pressing them down gently so the surface is relatively flat and the cubes are snugly packed — you want contact between the bread and the cheese layer above it, not gaps that trap air. Combine the shredded mozzarella and grated Parmesan in a bowl, toss to mix, then distribute the cheese blend evenly across the entire top of the bread, covering it completely edge to edge, just as you see in the photo.
-
💡 Embedded Tip: Mixing mozzarella and Parmesan before topping serves a specific purpose: mozzarella provides the stretchy, melty pull while Parmesan provides the proteins that brown and blister under oven heat. Combined, they produce exactly the two-tone golden-and-ivory blistered crust visible in the photo that neither cheese achieves as well on its own.
-
Step 5: Bake to Golden, Blistered Perfection
-
Slide the baking dish onto the preheated baking sheet on the center rack. Bake at 400°F for 18–22 minutes, until the cheese is completely melted, bubbling actively across the full surface, and showing deep golden-brown blistering in patches — the color you can see in the photo, ranging from pale ivory to deep amber at the most exposed points. The edges of the dish should be showing cheese that has set and crisped against the ceramic sides.
-
Doneness is entirely a visual cue for this recipe: when the blistering covers roughly two-thirds of the surface and the edges are a deep golden brown, pull it from the oven. Don't wait for every spot to be uniformly brown — some lighter patches between the blisters are characteristic of this style of bake, not a sign it needs more time.
-
Step 6: Rest Briefly, Then Serve
-
Remove the cheesy garlic bread bake from the oven and let it rest in the dish for 3–4 minutes. This brief pause allows the cheese layer to set slightly from an actively molten state to a more cohesive, sliceable one — a spatula pressed against it immediately out of the oven will cause it to slide off in sheets rather than lifting cleanly. After resting, use a wooden spatula or wide serving spoon to scoop and serve directly from the dish.
Nutrition Facts
Servings 6
- Amount Per Serving
- Calories 290kcal
- % Daily Value *
- Total Fat 16g25%
- Saturated Fat 9g45%
- Protein 12g24%
* Percent Daily Values are based on a 2,000 calorie diet. Your daily value may be higher or lower depending on your calorie needs.