
Creamy Raspberry Coconut Ice Cream with Toasted Coconut & Almonds
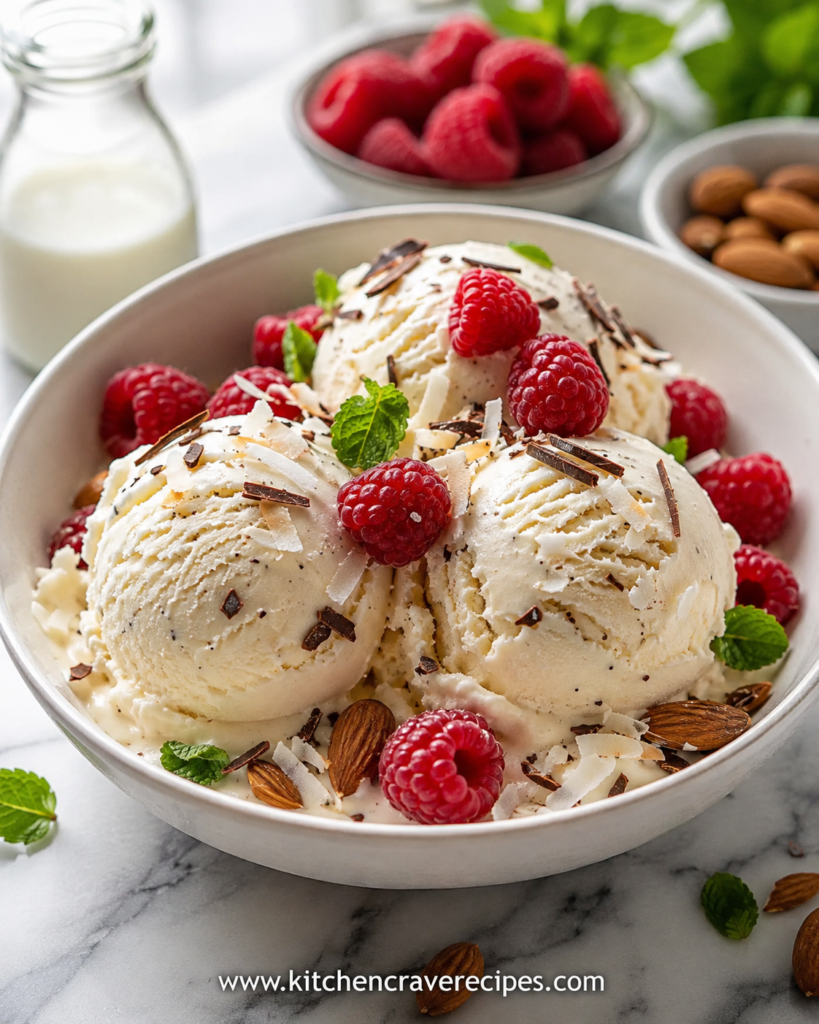
The photo makes the case better than any description could: four pale, ivory-toned scoops piled into a wide white bowl on a marble surface, scattered generously with whole fresh raspberries, toasted coconut flakes, raw almonds, dark chocolate shavings, and bright mint leaves. A glass bottle of coconut milk and bowls of fresh raspberries and almonds sit in the background, making the ingredient story completely legible before you even read the recipe.
This raspberry coconut ice cream is a no-churn dessert built on a full-fat coconut cream base — no eggs, no custard, no ice cream maker required. The coconut flavor is present but not overpowering; the scoops read as creamy and neutral, which is exactly why the fresh raspberry garnish and the bitter edge of the chocolate shavings work so well against them. Everything about this dessert is clean, bright, and genuinely easy to pull together in an afternoon.
Recipe Quick Info
| Detail | Info |
|---|---|
| Prep Time | 20 minutes |
| Cook Time | 0 minutes (freeze time: 6 hours) |
| Total Time | 6 hours 20 minutes (mostly hands-off) |
| Servings | 8 scoops (serves 4) |
| Cuisine | American |
| Course | Dessert / Frozen Treat |
| Calories | ~290 per serving (2 scoops) |
| Difficulty | Simple |
Why You’ll Love This Raspberry Coconut Ice Cream
- Completely dairy-free — The entire base is built on full-fat coconut cream, making this naturally suitable for anyone avoiding dairy without requiring any specialty substitutes.
- No ice cream maker needed — A hand mixer and a loaf pan are the only equipment between you and a finished batch of raspberry coconut ice cream.
- Fresh raspberries in every bowl — Scattered generously across each serving, the berries provide a tart, juicy contrast to the sweet, creamy scoops that no artificial flavoring can replicate.
- Toasted coconut and almonds add real crunch — The textural contrast between silky ice cream and the nutty garnish is what makes this bowl feel like a complete dessert rather than plain frozen cream.
- Chocolate shavings cut the sweetness — A light scattering of dark chocolate across the top adds a slightly bitter edge that keeps the dessert balanced and interesting.
- Stunning presentation with minimal effort — White scoops against red raspberries in a clean white bowl looks genuinely impressive; guests consistently ask if you made it from scratch (you did).
Ingredients
For the Coconut Ice Cream Base
- 2 cans (13.5 oz each / 800ml total) full-fat coconut cream, refrigerated overnight
- ½ cup (60g) powdered sugar, sifted
- 1 teaspoon pure vanilla extract
- ⅛ teaspoon fine salt
- 2 tablespoons sweetened condensed coconut milk (or regular, if not dairy-free)
For Garnish (as shown)
- 1 cup (125g) fresh raspberries
- ¼ cup (20g) toasted coconut flakes (sweetened or unsweetened)
- ¼ cup (35g) whole raw almonds
- 2 tablespoons dark chocolate shavings (use a vegetable peeler on a chilled chocolate bar)
- Fresh mint leaves
Optional Add-Ins
- ½ teaspoon coconut extract (intensifies coconut flavor in the base)
- 2 tablespoons raspberry jam swirled into the base before freezing
- 1 tablespoon honey or agave (in place of powdered sugar for a less processed sweetener)
Ingredient Substitutions
| Original Ingredient | Substitution | Notes |
|---|---|---|
| Full-fat coconut cream | Heavy whipping cream | Makes the base non-dairy-free but produces an ultra-rich, very white scoop |
| Powdered sugar | Sifted coconut sugar | Adds a slight caramel tone and darker color to the base |
| Sweetened condensed coconut milk | Regular sweetened condensed milk | Works identically; use if dairy-free status is not a concern |
| Dark chocolate shavings | White chocolate shavings | Visually striking; sweeter flavor profile, less bitter contrast |
| Raw almonds | Toasted macadamia nuts or cashews | Both pair naturally with coconut; macadamias especially so |
| Fresh raspberries | Fresh strawberries or blackberries | Strawberries give a sweeter garnish; blackberries are slightly more tart |
Kitchen Tools Needed
- Stand mixer or hand mixer with whisk attachment
- Large mixing bowl (chilled in the freezer for 10 minutes before use)
- 9×5-inch loaf pan or similar freezer-safe container
- Plastic wrap
- Can opener
- Fine-mesh sieve (for sifting powdered sugar)
- Vegetable peeler (for chocolate shavings)
- Ice cream scoop
- Measuring cups and spoons
Step-by-Step Instructions
Step 1: Chill the Coconut Cream Overnight
The night before you plan to make this raspberry coconut ice cream, place both cans of full-fat coconut cream in the refrigerator — do not shake or disturb them. Chilling causes the thick coconut cream to separate from the watery liquid at the bottom, giving you a dense, whippable solid that behaves much like heavy cream. Without this step, the cream won’t whip to stiff peaks regardless of how long you beat it.
Embedded Tip: Not all coconut cream brands whip equally well. Look for brands with a fat content of 20% or higher on the label. Trader Joe’s, Native Forest, and Aroy-D are consistently reliable choices for whipping.
Step 2: Whip the Coconut Cream
Open the chilled cans carefully without shaking and scoop only the solid white cream into your chilled mixing bowl, leaving the liquid behind. Reserve the liquid for smoothies or oatmeal — it doesn’t go into the base. Whip the solid coconut cream on medium-high speed for 3–4 minutes until light, fluffy, and holding soft peaks. It won’t be quite as voluminous as dairy whipped cream, but the texture should look airy and cloud-like.
Step 3: Add Sweetener, Vanilla, and Salt
Add the sifted powdered sugar, vanilla extract, salt, and condensed coconut milk to the whipped cream. Beat on medium speed for another 60–90 seconds until everything is fully incorporated and the mixture holds firm peaks. Taste at this point — the base should be pleasantly sweet with a clean coconut flavor. If it tastes flat, a drop more vanilla and a pinch more salt will bring it into focus immediately.
Embedded Tip: Sifting the powdered sugar before adding it prevents small lumps from forming in the base. Lumps that don’t dissolve during beating will show up as small icy spots in the finished ice cream.
Step 4: Pour and Freeze
Transfer the whipped coconut base into a 9×5-inch loaf pan and spread it into an even layer with a rubber spatula. Press a sheet of plastic wrap firmly against the surface to prevent ice crystals from forming on top — even a brief air exposure creates a thick, icy crust. Freeze for a minimum of 6 hours, or overnight for best results. The ice cream is ready when it scoops cleanly and holds its round shape without immediately collapsing.
For guidance on safe frozen dessert storage temperatures, the FDA’s food safety resource on refrigeration and freezing provides clear household guidance.
Step 5: Toast the Coconut Flakes
While the ice cream freezes, toast the coconut flakes in a dry skillet over medium-low heat, stirring constantly for 2–3 minutes until golden and fragrant. Watch them closely — the line between toasted and burnt is narrow with coconut, and they continue browning slightly after leaving the pan. Cool completely on a plate before using as garnish.
Step 6: Make the Chocolate Shavings
Run a vegetable peeler firmly along the edge of a chilled dark chocolate bar to produce thin, curling shavings. The chocolate must be cold for this to work — warm chocolate crumbles rather than curls. Keep the shavings refrigerated until the moment you plate. If your kitchen is warm, work quickly; chocolate shavings melt almost immediately on contact with warm hands.
Step 7: Scoop and Assemble
Let the loaf pan sit at room temperature for 4–5 minutes before scooping. Use a scoop briefly warmed under hot water for clean, round balls. Pile 2–3 scoops into a wide, shallow white bowl. Scatter fresh raspberries around and between the scoops generously, then add the toasted coconut flakes, whole almonds, chocolate shavings, and fresh mint leaves exactly as shown. Serve immediately.
Pro Tips for the Best Raspberry Coconut Ice Cream
- Use only full-fat coconut cream, never light. Light coconut cream doesn’t have enough fat content to whip properly. The base will be liquid rather than fluffy, and the finished ice cream will freeze into a dense, icy block instead of a creamy, scoopable one.
- Don’t skip the overnight refrigeration. Even one hour of chilling isn’t enough. The cream needs a full 8–12 hours in the refrigerator for the fat to solidify completely and the whipping to work as intended.
- Add the garnish last-minute, not ahead. Fresh raspberries release juice quickly once they hit cold ice cream — gorgeous for photos, but they turn soggy within a few minutes. Garnish each bowl just before handing it to someone.
- Pre-chill the serving bowls. Set the bowls in the freezer for 10 minutes before scooping. Cold bowls slow the melting process and give you an extra 2–3 minutes before the scoops start softening significantly.
- Keep shavings cold until plating. Chocolate shavings are fragile. Make them directly from the refrigerator, keep them on a cold plate, and scatter them last, just before the bowl goes to the table.
Common Mistakes to Avoid
- Using coconut milk instead of coconut cream.
The fix: These are not interchangeable for whipping. Coconut milk is thinner and lower in fat — it won’t whip. Look specifically for “coconut cream” on the label, not “cream of coconut,” which is sweetened and used in cocktails. - Skipping overnight refrigeration of the cans.
The fix: There’s no shortcut here. Even placing cans in the freezer for an hour doesn’t replicate what overnight refrigerator chilling does to the fat structure. Plan at least one day ahead. - Including the watery liquid from the can.
The fix: Pour off or reserve the coconut water at the bottom of the can before scooping the solid cream. Even a small amount of watery liquid prevents proper whipping and produces a soupy base. - Over-sweetening the base.
The fix: The fresh raspberry garnish and the condensed milk both contribute significant sweetness. Taste before adding any optional extra sweetener — the base is often correctly balanced as written. - Garnishing too far in advance.
The fix: Fresh raspberries bleed vivid red juice within 3–4 minutes of touching the cold ice cream. Scatter the garnish directly before serving, not when you’re setting the table 15 minutes earlier. - Freezing in a container that’s too deep.
The fix: A deep container freezes unevenly, leaving a soft center while the edges become rock-hard. A standard loaf pan provides the right depth-to-surface ratio for even freezing throughout. - Scooping straight from a hard freeze.
The fix: Coconut-based ice cream freezes firmer than dairy versions. Always allow 4–6 minutes at room temperature before attempting to scoop, or you’ll get crumbly, rough edges rather than round, clean balls.
Variations
Healthy Lighter Version
Reduce the powdered sugar to ¼ cup and replace the condensed coconut milk with 1 tablespoon of pure maple syrup. Swap the almond garnish for sliced fresh strawberries to keep the added sugar lower without losing the fruity freshness. The base will be slightly less sweet and slightly icier in texture, but still genuinely good — and meaningfully lower in sugar per serving.
Vegan Version
This raspberry coconut ice cream is fully vegan as written, provided you use sweetened condensed coconut milk rather than regular condensed milk. Every other component — the coconut cream, the raspberries, the almonds, the chocolate — is already plant-based. Simply confirm your dark chocolate brand is dairy-free if strict veganism is required.
Raspberry Swirl Variation
Warm 3 tablespoons of seedless raspberry jam in a small saucepan until loose and pourable, then let it cool to room temperature. After spreading the coconut base into the loaf pan, drizzle the jam across the top and drag a toothpick through it in wide figure-eight strokes to create a visible swirl. This version gives you raspberry flavor throughout the ice cream rather than only in the garnish — the contrast of pink swirl against white base is visually striking.
Gluten-Free Version
This raspberry coconut ice cream is naturally gluten-free as written — every main ingredient contains no wheat, barley, or rye. The only thing to verify is your chocolate bar brand; some flavored chocolate products contain barley malt. Plain dark chocolate is almost universally gluten-free, but checking the label takes five seconds and removes all uncertainty.
Low-Sugar / Keto-Friendly Version
Replace the powdered sugar with an equal volume of powdered erythritol, and omit the sweetened condensed milk entirely — substitute 1 tablespoon of MCT oil for the same smooth, creamy texture contribution. Garnish with fresh raspberries (naturally low in net carbs) and skip the toasted sweetened coconut in favor of unsweetened coconut chips. The flavor profile stays recognizably coconut-forward and satisfying within a lower-carbohydrate framework.
What to Serve With This Recipe
- Fresh raspberry coulis — A quick stovetop sauce made from raspberries, a little sugar, and lemon juice drizzled over each bowl makes the fruit element even more pronounced and restaurant-quality.
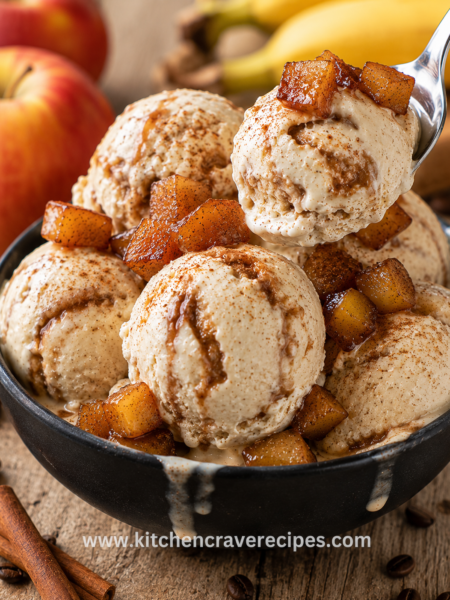
- Caramel Apple Ice Cream: 6-Ingredient Best & Foolproof Recipe— A thin slice served alongside gives this dessert a warm, buttery component that contrasts beautifully with the cold scoops.
- Crispy coconut macaroons — Chewy, toasted coconut cookies echo the flavors in the ice cream and add a satisfying textural counterpoint.
- Sparkling water with lime — A simple glass of sparkling water resets the palate between bites and cuts through the richness of the coconut base.
- Dark chocolate bark — A few shards of thin, bitter dark chocolate bark alongside the bowl doubles down on the chocolate shaving garnish in a more substantial way.
- Fresh fruit platter — A small plate of sliced mango, kiwi, and additional raspberries turns a bowl of ice cream into a complete, produce-forward summer dessert spread.
- Creamy Mango Sorbet: 4-Ingredient Easy & Foolproof Recipe— Served side by side, the two sorbets create a tropical dessert duo with contrasting colors and complementary flavors.
- Toasted almond biscotti — The crunch of biscotti against the soft, cold scoops creates one of the most satisfying texture contrasts in simple dessert serving.
Storage Instructions
Freezer
Store the raspberry coconut ice cream in its loaf pan or transfer it to an airtight freezer-safe container. Always press plastic wrap directly against the surface before sealing. It keeps at peak quality for up to 2 weeks. After that, the texture begins to coarsen slightly as ice crystals form — still safe to eat, but the scoopable quality diminishes.
Refrigerator
Do not store this ice cream in the refrigerator. Even at refrigerator temperatures, it will melt within 30–45 minutes and cannot be re-frozen to the same creamy texture. Keep it frozen until 4–5 minutes before serving.
Shelf Life Summary
| Storage Method | Duration | Quality Notes |
|---|---|---|
| Freezer (optimal) | Up to 2 weeks | Best scooping texture and fresh flavor |
| Freezer (extended) | Up to 4 weeks | Safe; may develop slight iciness |
| Refrigerator | Not recommended | Melts within 30–45 minutes |
| Room temperature | Serve immediately | Softens noticeably within 5 minutes |
Serving After Freezing (Tempering Instructions)
Because coconut cream freezes firmer than dairy cream, every serving benefits from a short tempering period before scooping.
From a 6-Hour Freeze
Let the pan sit at room temperature for exactly 4–5 minutes. The outer layer will soften enough to scoop cleanly while the center stays firm and cold. Run the scoop under hot water and dry it quickly between each scoop.
From an Overnight Freeze
Allow 5–7 minutes of tempering at room temperature. The ice cream will be noticeably harder after an extended freeze and needs the full rest to scoop without crumbling.
If Texture Becomes Icy After Extended Storage
Let the ice cream soften until it can be broken into chunks, then blend in a food processor for 15–20 seconds until smooth. Return it to the container and re-freeze for 2 hours. This restores most of the original scoopable texture. For broader guidance on safe freezing and thawing practices, visit FoodSafety.gov’s cold food storage chart.
Nutrition Facts
(Per serving: approximately 2 scoops of ice cream base / ¼ of the total batch, without garnish)
| Nutrient | Amount |
|---|---|
| Calories | ~290 kcal |
| Total Fat | 22g |
| Saturated Fat | 18g |
| Cholesterol | 0mg |
| Sodium | 65mg |
| Total Carbohydrates | 24g |
| Dietary Fiber | 0g |
| Total Sugars | 21g |
| Protein | 2g |
Disclaimer: Nutrition values are estimates calculated using standard ingredient databases and will vary based on specific coconut cream brand, sweetener used, portion size, and garnish amounts. These figures are for general reference only and are not intended as medical or dietary advice. For precise nutritional data, use a certified nutrition calculator with your exact ingredients.
Frequently Asked Questions
Q: Can I make raspberry coconut ice cream without an ice cream maker?
A: Yes — this recipe is designed specifically for that. The whipped coconut cream base freezes into a smooth, scoopable texture without any churning. The key is using properly chilled full-fat coconut cream and following the overnight refrigeration step.
Q: Why won’t my coconut cream whip properly?
A: The most common causes are using light coconut milk instead of full-fat coconut cream, not refrigerating the cans overnight, or accidentally including the watery liquid from the bottom of the can. All three prevent the fat from whipping. Start with cold cans, scoop only the solid cream, and try a higher-fat brand if problems persist.
Q: Can I mix the raspberries into the base instead of using them only as a garnish?
A: Yes — fold ½ cup of fresh or frozen (thawed and drained) raspberries gently into the base just before pouring into the pan. The berries will break up slightly and tint the base a soft pink. Be aware that excess raspberry juice can make the base slightly icier after freezing; drain the berries well first.
Q: How long does raspberry coconut ice cream keep in the freezer?
A: At peak quality, up to 2 weeks with plastic wrap pressed against the surface. It remains safe to eat for up to 4 weeks but may develop a coarser texture as ice crystals form over time.
Q: Can I use frozen raspberries instead of fresh for the garnish?
A: Fresh raspberries are strongly preferred for garnish — frozen raspberries release liquid immediately when thawed and become soft and mushy on contact with cold ice cream. If fresh berries aren’t available, a drizzle of raspberry sauce made from frozen berries is a better option than using the thawed berries directly as garnish.
Q: What brand of coconut cream works best for whipping?
A: Brands with higher fat content (20% or above) perform best. Aroy-D, Native Forest, and Trader Joe’s coconut cream are consistently reliable. Avoid brands with added gums or stabilizers that prevent proper fat separation during refrigeration.
Q: Is this recipe suitable for people with nut allergies?
A: The base itself contains no nuts. The almond garnish shown in the photo can be omitted entirely without affecting the ice cream. Verify your chocolate bar is processed in a nut-free facility if serving someone with a severe allergy, as cross-contamination is possible.
Q: Can I make this in individual cups instead of a loaf pan?
A: Yes — divide the base among six to eight silicone muffin cups or small ramekins and press plastic wrap against each surface. They freeze faster (about 3–4 hours) and unmold easily for an individually plated presentation.
Q: How do I get clean, round scoops rather than rough chunks?
A: Let the container temper at room temperature for 4–6 minutes. Run your ice cream scoop under hot water, shake off the excess water, and dry it briefly before each scoop. The brief heat on the metal edge is what releases the round ball cleanly.
Q: Can I sweeten the base with honey instead of powdered sugar?
A: Yes — substitute 3 tablespoons of honey or agave for the powdered sugar. Liquid sweeteners integrate slightly differently than powdered sugar and can make the base marginally icier, but the result is still very good. Avoid adding more than 3 tablespoons of liquid sweetener or the base may not freeze as firmly.
Expert Chef Tips
1. Cold everything, always.
Chill the mixing bowl, use cold coconut cream straight from the refrigerator, and even chill the loaf pan before pouring in the base. Cold equipment at every stage produces smaller ice crystals and a noticeably smoother texture — the same principle that makes commercial ice cream operations chill their mixing equipment before production.
2. Toasted coconut amplifies the coconut flavor.
Raw coconut flakes have a mild, almost watery flavor compared to their toasted counterpart. Spending 2–3 minutes in a dry skillet transforms them into something nutty, golden, and genuinely fragrant — it makes the garnish taste as good as it looks and ties the topping to the coconut base below it.
3. Taste the base before freezing, not after.
Once frozen, adjusting sweetness or flavor is impossible without thawing and reprocessing. A quick taste test after Step 3 is the moment to add a drop more vanilla, a pinch more salt, or a bit more sweetener. Frozen food always tastes slightly less sweet than it does at room temperature, so aim for slightly sweeter than you’d expect.
4. The plastic wrap trick is non-negotiable.
Air exposure on the surface of any frozen dessert creates a thick, unpleasant icy crust that ruins the first scoop and looks terrible in the bowl. Pressing plastic wrap directly flush against the surface before the lid goes on adds 10 seconds of effort and saves the entire top layer of your batch.
5. Let the chocolate do the work.
The dark chocolate shavings in this raspberry coconut ice cream aren’t purely decorative. Their slight bitterness pulls the dessert away from pure sweetness and gives it a complexity that makes people eat more slowly, tasting each element rather than just eating through the bowl. Use a quality dark chocolate (60% cacao or higher) for the best effect.
Recipe Summary
This raspberry coconut ice cream is a no-churn, dairy-free frozen dessert made from whipped full-fat coconut cream, sweetened simply and finished with a genuinely beautiful garnish of fresh raspberries, toasted coconut flakes, whole almonds, dark chocolate shavings, and fresh mint. The active prep takes about 20 minutes; the freezer handles everything else. Make it the day before you plan to serve it, and the only work left at serving time is scooping.
Conclusion
Few desserts balance visual impact with actual ease the way this one does. A bowl of raspberry coconut ice cream — pale, creamy scoops against vivid red berries, golden toasted coconut, and dark chocolate curls — looks like something you’d order at a restaurant, and it comes together at home with a hand mixer and an overnight chill. There’s nothing fussy about it, and that’s exactly the point. Make a batch this weekend and find out how quickly the loaf pan empties.
Raspberry Coconut Ice Cream: 5-Ingredient Best & Foolproof Recipe
Description
The photo makes the case better than any description could: four pale, ivory-toned scoops piled into a wide white bowl on a marble surface, scattered generously with whole fresh raspberries, toasted coconut flakes, raw almonds, dark chocolate shavings, and bright mint leaves. A glass bottle of coconut milk and bowls of fresh raspberries and almonds sit in the background, making the ingredient story completely legible before you even read the recipe.
Ingredients
Instructions
-
Step-by-Step Instructions
-
Step 1: Chill the Coconut Cream Overnight
-
The night before you plan to make this raspberry coconut ice cream, place both cans of full-fat coconut cream in the refrigerator — do not shake or disturb them. Chilling causes the thick coconut cream to separate from the watery liquid at the bottom, giving you a dense, whippable solid that behaves much like heavy cream. Without this step, the cream won't whip to stiff peaks regardless of how long you beat it.
-
Embedded Tip: Not all coconut cream brands whip equally well. Look for brands with a fat content of 20% or higher on the label. Trader Joe's, Native Forest, and Aroy-D are consistently reliable choices for whipping.
-
Step 2: Whip the Coconut Cream
-
Open the chilled cans carefully without shaking and scoop only the solid white cream into your chilled mixing bowl, leaving the liquid behind. Reserve the liquid for smoothies or oatmeal — it doesn't go into the base. Whip the solid coconut cream on medium-high speed for 3–4 minutes until light, fluffy, and holding soft peaks. It won't be quite as voluminous as dairy whipped cream, but the texture should look airy and cloud-like.
-
Step 3: Add Sweetener, Vanilla, and Salt
-
Add the sifted powdered sugar, vanilla extract, salt, and condensed coconut milk to the whipped cream. Beat on medium speed for another 60–90 seconds until everything is fully incorporated and the mixture holds firm peaks. Taste at this point — the base should be pleasantly sweet with a clean coconut flavor. If it tastes flat, a drop more vanilla and a pinch more salt will bring it into focus immediately.
-
Embedded Tip: Sifting the powdered sugar before adding it prevents small lumps from forming in the base. Lumps that don't dissolve during beating will show up as small icy spots in the finished ice cream.
-
Step 4: Pour and Freeze
-
Transfer the whipped coconut base into a 9×5-inch loaf pan and spread it into an even layer with a rubber spatula. Press a sheet of plastic wrap firmly against the surface to prevent ice crystals from forming on top — even a brief air exposure creates a thick, icy crust. Freeze for a minimum of 6 hours, or overnight for best results. The ice cream is ready when it scoops cleanly and holds its round shape without immediately collapsing.
-
For guidance on safe frozen dessert storage temperatures, the FDA's food safety resource on refrigeration and freezing provides clear household guidance.
-
Step 5: Toast the Coconut Flakes
-
While the ice cream freezes, toast the coconut flakes in a dry skillet over medium-low heat, stirring constantly for 2–3 minutes until golden and fragrant. Watch them closely — the line between toasted and burnt is narrow with coconut, and they continue browning slightly after leaving the pan. Cool completely on a plate before using as garnish.
-
Step 6: Make the Chocolate Shavings
-
Run a vegetable peeler firmly along the edge of a chilled dark chocolate bar to produce thin, curling shavings. The chocolate must be cold for this to work — warm chocolate crumbles rather than curls. Keep the shavings refrigerated until the moment you plate. If your kitchen is warm, work quickly; chocolate shavings melt almost immediately on contact with warm hands.
-
Step 7: Scoop and Assemble
-
Let the loaf pan sit at room temperature for 4–5 minutes before scooping. Use a scoop briefly warmed under hot water for clean, round balls. Pile 2–3 scoops into a wide, shallow white bowl. Scatter fresh raspberries around and between the scoops generously, then add the toasted coconut flakes, whole almonds, chocolate shavings, and fresh mint leaves exactly as shown. Serve immediately.
Nutrition Facts
Servings 8
- Amount Per Serving
- Calories 290kcal
- % Daily Value *
- Total Fat 22g34%
- Saturated Fat 18g90%
- Protein 2g4%
* Percent Daily Values are based on a 2,000 calorie diet. Your daily value may be higher or lower depending on your calorie needs.