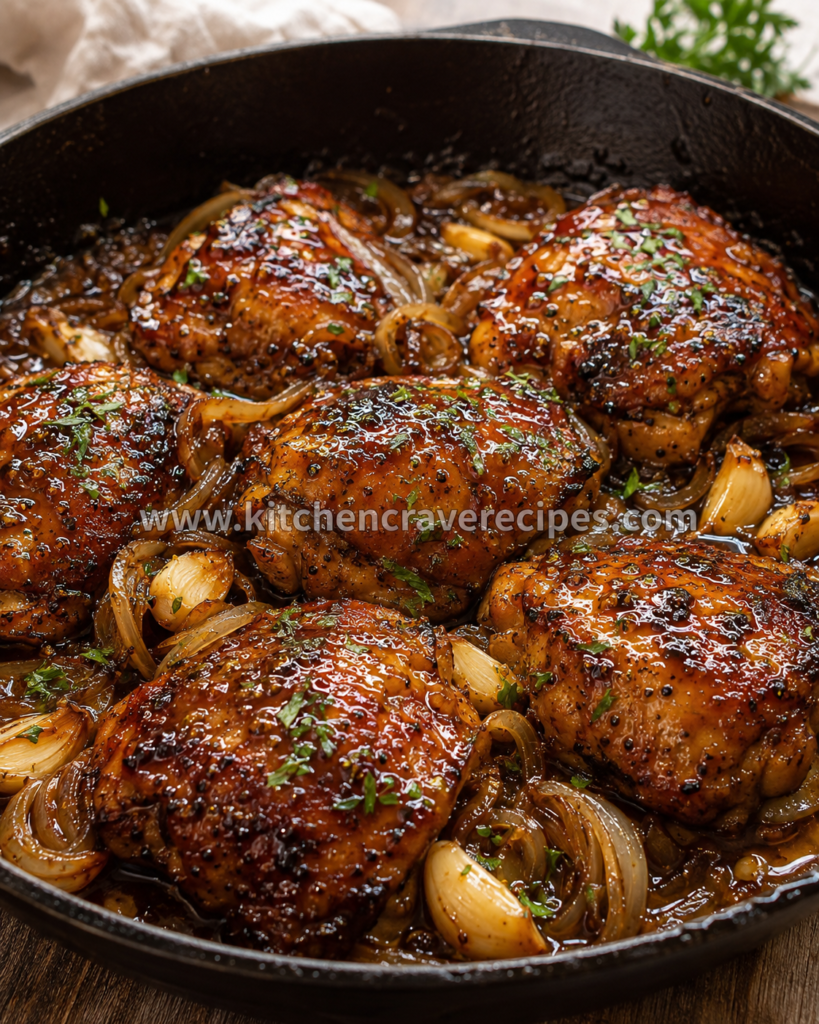

Best 30-Minute Honey Garlic Chicken Thighs (Ultimate Recipe)
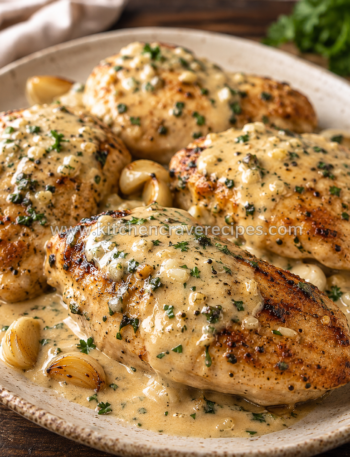
There are weeknight dinners you settle for, and then there are weeknight dinners you actually look forward to making. Honey garlic chicken thighs fall firmly in the second category. These are the thighs that hit the skillet with a satisfying sizzle, caramelize into a glossy, amber-colored glaze, and fill your kitchen with an aroma that brings everyone to the table before you’ve even called them. Sautéed on the stovetop in a single skillet, they’re done in about 30 minutes from start to finish — no oven required, no fuss. Whether you’re cooking for two on a Tuesday or feeding a hungry family, this recipe is the kind of reliable, crowd-pleasing weeknight hero that earns a permanent spot in your regular rotation.
Recipe Quick Info
| Field | Details |
|---|---|
| Prep Time | 10 minutes |
| Cook Time | 20 minutes |
| Total Time | 30 minutes |
| Servings | 4 |
| Course | Main Course |
| Cuisine | American |
| Cooking Method | Sautéing |
| Calories | ~390 per serving |
| Difficulty | Easy |
Why You’ll Love This Recipe
- One pan, zero drama. Everything — chicken and sauce — is cooked in a single skillet, which means minimal cleanup and maximum flavor from the fond left behind.
- Ready in 30 minutes flat. Sautéing over medium-high heat keeps this recipe fast and weeknight-friendly without sacrificing depth of flavor.
- Incredibly sticky, savory-sweet glaze. The sauce thickens right in the pan around the chicken, coating every surface in a rich, glossy finish that clings like it means business.
- Budget-friendly protein. Bone-in, skin-on chicken thighs cost less than chicken breasts and deliver far more flavor and moisture — a genuine win on both counts.
- Pantry staples only. Honey, garlic, soy sauce, and a few other everyday ingredients are all you need — nothing obscure, nothing that requires a specialty store trip.
- Kid-approved and adult-obsessed. The sauce is savory-sweet with just enough depth from soy and a touch of vinegar to keep grown-up palates fully engaged.
- Easily scalable. Double the batch for meal prep or a dinner party — just use a larger skillet or work in two pans simultaneously.
Ingredients
For the Chicken
- 4 bone-in, skin-on chicken thighs (about 2 lbs total)
- 1 teaspoon kosher salt
- ½ teaspoon freshly ground black pepper
- ½ teaspoon garlic powder
- 1 tablespoon olive oil or avocado oil
For the Honey Garlic Sauce
- 6 cloves garlic, minced (about 2 tablespoons)
- ⅓ cup honey
- 3 tablespoons low-sodium soy sauce
- 1 tablespoon apple cider vinegar
- 1 teaspoon cornstarch
- 2 tablespoons cold water
Optional Garnish
- 1 teaspoon toasted sesame seeds
- 2 tablespoons thinly sliced scallions
- Fresh red chili flakes, to taste
Optional Add-Ins
- ½ teaspoon grated fresh ginger (adds warmth and complexity to the sauce)
- 1 tablespoon unsalted butter (stir into the sauce at the end for extra richness and shine)
Ingredient Substitutions
| Original Ingredient | Substitution | Notes |
|---|---|---|
| Bone-in, skin-on thighs | Boneless, skinless thighs | Reduce cook time by 3–4 minutes per side; check internal temp early |
| Honey | Pure maple syrup | Nearly identical sweetness; slightly earthier flavor |
| Soy sauce | Tamari or coconut aminos | Tamari = gluten-free; coconut aminos = lower sodium, slightly sweeter |
| Apple cider vinegar | Rice vinegar or fresh lemon juice | Maintains the bright, acidic balance in the sauce |
| Olive oil | Avocado oil or vegetable oil | Any neutral, high-smoke-point oil works for sautéing |
| Cornstarch | Arrowroot powder (equal amount) | Good for paleo or grain-free adaptations |
Kitchen Tools Needed
- 12-inch stainless steel or cast iron skillet — the essential tool for sautéing; provides even, high heat and builds excellent fond (browned bits) for the sauce
- Tongs — for flipping and maneuvering the thighs safely in a hot pan without piercing the skin
- Instant-read meat thermometer — mandatory for confirming the chicken has reached a safe internal temperature of 165°F
- Small mixing bowl — for whisking together the honey garlic sauce ingredients before adding them to the pan
- Whisk or fork — to dissolve the cornstarch slurry evenly
- Knife and cutting board — for mincing garlic and slicing scallions
- Splatter screen (optional but highly recommended) — sautéing skin-on chicken thighs at medium-high heat produces significant spatter; a splatter screen keeps your stovetop clean
Step-by-Step Instructions
Step 1: Dry and Season the Chicken
Pat the chicken thighs completely dry with paper towels — and don’t skip this step. Moisture on the skin creates steam in the pan, which is the enemy of a good sear. Combine the salt, pepper, and garlic powder in a small bowl, then season both sides of each thigh generously. Set them aside at room temperature while you prep the sauce — about 5 to 10 minutes at room temperature helps them cook more evenly.
Step 2: Mix the Honey Garlic Sauce
In a small bowl, whisk together the honey, soy sauce, and apple cider vinegar until combined. In a separate tiny cup, stir the cornstarch and cold water together until the cornstarch is fully dissolved — this is your slurry, and it’s what gives the sauce its glossy, clingy texture. Set both aside within arm’s reach of the stove before the chicken goes in, because once sautéing starts, things move quickly.
💡 Embedded Tip: Mince the garlic right before cooking — pre-minced jarred garlic lacks the sharp, pungent oils that make this sauce sing. Freshly minced is worth the extra two minutes.
Step 3: Sear the Chicken Skin-Side Down
Heat 1 tablespoon of oil in a 12-inch skillet over medium-high heat until the oil shimmers and just begins to send up a faint wisp of smoke — this usually takes about 1½ to 2 minutes. Place the seasoned thighs skin-side down in the hot pan, pressing each one gently with the tongs to make full contact with the surface. You should hear an immediate, assertive sizzle the moment each thigh hits the pan — if you don’t, your pan isn’t hot enough. Cook undisturbed for 8 to 9 minutes, until the skin is deep golden-brown and releases naturally from the pan without sticking.
💡 Embedded Tip: Resist the urge to lift, peek, or press the chicken during those first 8 minutes. The skin needs uninterrupted contact with the hot surface to render its fat and develop that crackling, golden crust.
Step 4: Flip and Cook the Second Side
Using tongs, flip each thigh to the meat side. The skin should be a rich, mahogany-gold color with visibly rendered, crispy edges. Reduce the heat slightly to medium and cook for another 7 to 8 minutes, until the thickest part of each thigh registers 165°F on an instant-read thermometer. The USDA recommends this as the safe minimum internal temperature for all poultry — for more on safe poultry handling and temperatures, see the USDA’s official poultry cooking guidelines.
Step 5: Build the Honey Garlic Sauce
Transfer the cooked thighs to a plate and tent loosely with foil. Reduce the pan heat to medium-low and carefully pour off all but about 1 tablespoon of the rendered fat. Add the minced garlic to the pan and sauté for 30 to 45 seconds, stirring constantly with a wooden spoon, until the garlic is fragrant and just starting to turn light golden — watch it closely, because garlic burns fast in a hot pan and bitter, scorched garlic will ruin the sauce. Pour in the honey-soy-vinegar mixture and stir, scraping up any browned bits from the bottom of the pan.
Step 6: Thicken and Glaze
Let the sauce come to a gentle simmer and bubble for 1 to 2 minutes, then pour in the cornstarch slurry while stirring continuously. The sauce will visibly thicken within 30 to 45 seconds, shifting from thin and watery to a glossy, syrup-like consistency that coats the back of a spoon. Return the chicken thighs to the pan, skin-side up, and spoon the glaze generously over the top. Cook for another 1 to 2 minutes, basting constantly, until the sauce has reduced slightly and clings to every surface of the chicken. Garnish with sesame seeds and scallions, and serve immediately.
For a complete, satisfying plate, try pairing these thighs with Best Cheesy Tater Tot Casserole — Easy 5-Ingredient Bake — it was practically made to soak up this sauce.
Pro Tips for Perfect Honey Garlic Chicken Thighs
1. Use a stainless steel or cast iron skillet — not nonstick.
Nonstick pans can’t withstand the sustained medium-high heat you need for a proper sear. Stainless steel and cast iron both handle high heat, build better fond, and give the chicken skin the kind of crackling golden crust a nonstick pan simply cannot replicate.
2. Don’t overcrowd the pan — this is the sauté method’s #1 rule.
Crowding the pan traps steam between the pieces and causes the chicken to braise rather than sear. Leave at least an inch of space between each thigh; if your pan can’t fit four comfortably, sauté in two batches and combine in the sauce at the end.
3. Let the fond work for you.
Those dark, caramelized bits stuck to the bottom of the pan after the chicken is done are pure concentrated flavor. When you deglaze with the sauce, scrape every bit of it up — it’s the reason restaurant-quality sauces taste so much deeper than home versions.
4. Pull the chicken just before the target temp.
If your thermometer reads 162°F, go ahead and remove the thighs from the heat — carryover cooking will carry them the remaining degrees to 165°F while they rest. This prevents any risk of overcooking the meat and keeps the thighs supremely juicy.
5. Adjust sauce consistency before serving.
If the glaze is too thick, add a tablespoon of water or low-sodium chicken broth and stir. If it’s too thin, let it bubble uncovered for another 30 seconds. Honey garlic sauce should flow like a light syrup, not sit like paste — coating the chicken easily, not cementing it.
Common Mistakes to Avoid
1. Starting with a cold or under-heated pan.
Adding chicken to a pan that isn’t fully preheated results in pale, rubbery skin that sticks and tears. Heat the oil until it shimmers and shows that faint smoke signal before the chicken ever touches the surface.
2. Overcrowding the sauté pan.
This is the cardinal sin of stovetop sautéing. When the pan is too full, steam builds up between the pieces and the chicken stews rather than sears — you lose the golden crust entirely. Cook in batches if needed; a great sear is worth the extra five minutes.
3. Flipping the chicken too early.
If the chicken resists when you try to flip it, it’s not ready. A properly seared thigh will release cleanly from the pan on its own. Forcing a flip too early tears the skin and leaves the golden crust behind on the pan.
4. Burning the garlic in Step 5.
After removing the chicken, the pan is still very hot. Garlic added to a screaming hot pan will go from raw to bitter-burned in under 30 seconds. Reduce the heat to medium-low and keep stirring — golden and fragrant is perfect; dark brown is a loss.
5. Skipping the cornstarch slurry.
Without a thickener, the sauce stays thin and watery and slides right off the chicken. The cornstarch slurry takes 15 seconds to mix and transforms the sauce from a broth to a glossy, restaurant-worthy glaze — don’t skip it.
6. Not drying the chicken skin first.
Wet skin steams instead of sears. Patting the thighs completely dry with paper towels before seasoning is a non-negotiable step — it’s the single most impactful thing you can do for crispy skin in a sauté pan.
7. Using high heat for the entire cook time.
Sautéing at medium-high is correct for the initial sear, but keeping the heat that high after flipping often chars the exterior before the interior reaches a safe temperature. Dropping to medium after the flip is the move — it finishes the cook gently without burning.
Variations
Healthy (Lower-Calorie)
Use boneless, skinless chicken thighs and reduce the honey to 3 tablespoons, adding an extra tablespoon of low-sodium soy sauce to compensate for depth. This version cuts the calorie count significantly while keeping the essential savory-sweet flavor profile. Finish with a squeeze of fresh lemon juice for brightness. Boneless thighs also cook faster — check for 165°F at the 12-minute mark total.
Vegetarian
Swap the chicken for two 14-oz blocks of extra-firm tofu, pressed and cut into 1-inch slabs. Pat dry thoroughly and sauté in oil over medium-high heat for 4 to 5 minutes per side until golden and crisp. The honey garlic sauce works beautifully on tofu — proceed with the sauce exactly as written. The result is a genuinely satisfying plant-based main.
Spicy Honey Garlic
Add 1 to 2 teaspoons of sambal oelek or Korean gochujang to the honey garlic sauce before adding it to the pan. This version builds real, sustained heat that plays beautifully against the honey’s sweetness. Garnish with sliced fresh red chilies alongside the scallions. Start with 1 teaspoon if you’re heat-sensitive — you can always add more next time.
Gluten-Free
The recipe is nearly gluten-free as written — the only swap needed is replacing regular soy sauce with tamari or certified gluten-free soy sauce in a 1:1 ratio. Double-check that your cornstarch brand is certified gluten-free (most are, but cross-contamination varies by brand). Everything else in the recipe remains unchanged.
Low-Carb / Keto
Replace the honey with a liquid keto sweetener such as Lakanto Monkfruit Blend (liquid form) or Swerve Brown, using the same volume. Replace the cornstarch slurry with ¼ teaspoon xanthan gum whisked directly into the sauce (no water needed). This version drops the net carbs dramatically while keeping the sticky, savory glaze texture intact. Note that the sauce will thicken faster with xanthan gum — stir quickly once added.
What to Serve With Honey Garlic Chicken Thighs
- Steamed jasmine rice — the classic pairing; absorbs every drop of sauce with zero resistance.
- Garlic butter noodles — egg noodles tossed in butter and garlic mirror the dish’s flavor while adding satisfying carbs.
- Roasted broccoli — the slight char from roasting broccoli is a natural, slightly bitter counterpoint to the sweet sauce.
- Simple cucumber salad — cool, crisp, and lightly dressed; cuts through the richness of the glaze beautifully.
- Bok choy sautéed in sesame oil — keeps the Asian-inspired flavor profile cohesive and adds green vegetable nutrition.
- Mashed cauliflower — a satisfying lower-carb base that soaks up the honey garlic glaze like a dream.
- Our easy weeknight fried rice — try Best Cheesy Tater Tot Casserole — Easy 5-Ingredient Bake for a complete, restaurant-style dinner.
- Crusty bread or dinner rolls — unconventional but genuinely useful for mopping the pan after everyone fights over the last piece.
Storage Instructions
Refrigerator
Allow the cooked chicken thighs to cool to room temperature — no longer than 2 hours after cooking — before transferring to an airtight container. Store in the refrigerator for up to 4 days. Store any extra sauce separately in a small sealed container; it refrigerates well and can be spooned over the chicken during reheating.
Freezer
Honey garlic chicken thighs freeze well. Place fully cooled thighs in a freezer-safe zip-top bag or airtight container, pressing out as much air as possible. Freeze for up to 3 months. Thaw overnight in the refrigerator before reheating — do not thaw at room temperature for food safety reasons.
Shelf Life Summary
| Storage Method | Duration |
|---|---|
| Refrigerator (airtight container) | Up to 4 days |
| Freezer (airtight, labeled) | Up to 3 months |
| Room temperature (cooked) | 2 hours maximum |
Reheating Instructions
Stovetop (Best Method)
Add the chicken thighs to a skillet over medium heat with 2 tablespoons of water or chicken broth. Cover with a lid and heat for 5 to 7 minutes, flipping once halfway through, until the internal temperature returns to 165°F. This method keeps the meat moist and partially re-crisps the skin.
Oven
Preheat your oven to 350°F. Place thighs in an oven-safe dish, add a splash of broth or water to the bottom, and cover tightly with foil. Reheat for 15 to 18 minutes, until warmed through to 165°F. Remove the foil for the last 3 minutes if you want to restore some skin crispness.
Microwave (Quickest Option)
Place one or two thighs on a microwave-safe plate and cover loosely with a damp paper towel to prevent drying. Microwave on medium power (70%) in 60-second intervals, checking the temperature between bursts, until steaming hot throughout. The skin will soften, but the flavor remains excellent.
For USDA-recommended guidelines on safely reheating cooked poultry, visit FoodSafety.gov’s reheating chart.
Nutrition Facts
Per serving (1 bone-in thigh with sauce, based on 4 servings)
| Nutrient | Amount |
|---|---|
| Calories | ~390 kcal |
| Total Fat | 22g |
| Saturated Fat | 6g |
| Cholesterol | 115mg |
| Sodium | 620mg |
| Total Carbohydrates | 18g |
| Sugars | 16g |
| Protein | 28g |
| Iron | 1.5mg |
Nutrition Disclaimer: These values are estimates calculated using standard nutrition databases and will vary based on the specific brands and ingredient sizes used. For precise dietary needs, calculate using your exact ingredients. This information is provided as a general guide only and does not constitute medical or dietetic advice.
Frequently Asked Questions
Can I use boneless, skinless chicken thighs instead?
Absolutely — boneless, skinless thighs work well in this recipe and sauté even faster. Reduce the cook time to roughly 5 to 6 minutes per side and start checking the internal temperature at the 10-minute mark. The skin-on version produces richer flavor and better texture, but boneless is a genuinely excellent lower-fat option.
Can I make honey garlic chicken thighs ahead of time?
Yes. Cook the thighs fully and refrigerate in an airtight container for up to 4 days. The sauce actually deepens in flavor overnight. Reheat gently using the stovetop method above with a splash of broth to revive the glaze. For best texture, avoid reheating more than once.
What if my sauce isn’t thickening?
Your cornstarch slurry may not have been fully dissolved, or the pan temperature may have dropped too low. Stir the slurry again to make sure there are no lumps, add it to the bubbling sauce, and increase the heat to medium. The sauce should thicken within 30 to 45 seconds once it reaches a proper simmer.
Can I bake these instead of sautéing them?
You can, though the method changes significantly. For baked honey garlic chicken thighs, preheat the oven to 400°F, sear the thighs skin-side down in an oven-safe skillet for 4 minutes on the stovetop, pour the sauce over, and transfer the whole skillet to the oven for 25 to 28 minutes until 165°F internally. The sauté method here is faster and produces a crispier skin, but baking is a valid option for a more hands-off approach.
Why are my chicken thighs sticking to the pan?
One of two things: either the pan wasn’t hot enough before the chicken went in, or you’re trying to flip them too early. A properly preheated pan with shimmering oil and chicken thighs that have been fully patted dry will sear cleanly and release on their own. Give them the full 8 minutes undisturbed before attempting to flip.
Is this recipe kid-friendly?
Very much so. The sauce is sweet-forward with a mild savory depth — most kids respond enthusiastically to the sticky, glossy glaze. If cooking for children with a low spice tolerance, skip the optional chili flakes entirely and reduce the soy sauce by half for a milder, sweeter result.
How do I know when the garlic is ready without burning it?
Watch for color and smell, not the clock. Fresh minced garlic is ready when it turns light golden — almost blonde — and smells sharp, sweet, and deeply fragrant rather than raw. That window is about 30 to 45 seconds at medium-low heat. The moment it starts turning golden-brown at the edges, the sauce goes in immediately.
Can I double this recipe?
Yes, with one important note: don’t double up in a single 12-inch skillet. Crowding the pan kills the sear and causes the chicken to steam instead. Use two separate skillets simultaneously, or sauté in two batches and combine everything in the sauce stage. The total time stays roughly the same.
What kind of honey works best?
Any pure, liquid honey works — clover honey is the most neutral and commonly available, which makes it a reliable default. Wildflower honey adds a more complex floral note. Avoid flavored or whipped honey varieties, as they can behave differently when heated and may not glaze as evenly.
Can I make the sauce in advance?
Yes. Whisk together the honey, soy sauce, and vinegar up to 3 days ahead and store covered in the refrigerator. Wait to mix the cornstarch slurry until right before cooking — cornstarch begins to break down when left in liquid for too long, which compromises its thickening ability.
What oil is best for sautéing these at high heat?
Use an oil with a high smoke point: avocado oil (smoke point ~500°F), refined coconut oil (~450°F), or light olive oil (~465°F) are all excellent choices. Extra-virgin olive oil has a lower smoke point and can turn bitter under sustained high heat — it’s better reserved for finishing, not sautéing.
Can I add vegetables to the pan?
Yes — this is an easy one-pan extension. After removing the cooked chicken in Step 5, add thinly sliced bell peppers, snap peas, or baby bok choy to the pan and sauté for 2 to 3 minutes before building the sauce. The vegetables pick up the pan’s fond and flavor beautifully, and everything gets coated in the glaze together.
Expert Chef Tips
1. Temper the chicken before it hits the pan.
Pull the seasoned thighs out of the refrigerator 10 minutes before cooking. This brief rest at room temperature takes the chill off the meat, which promotes faster, more even cooking. Cold protein introduced to a hot pan cools the surface down immediately and slows the sear.
2. Don’t eyeball the honey — measure it.
Honey is dense and calorie-rich, and even a small excess shifts the sauce from balanced to cloyingly sweet. A kitchen scale or proper measuring cup makes a real difference here. ⅓ cup is the sweet spot — generous enough to glaze, restrained enough to stay savory.
3. Use a splatter screen from the start.
The moment skin-on chicken thighs hit a hot, oiled skillet, the fat in the skin renders rapidly and splatters. A splatter screen set over the pan from the very first second of contact keeps your stovetop clean and your forearms unburned — it’s one of those tools you’ll wonder how you cooked without.
4. Build the sauce directly in the chicken pan — always.
Every bit of rendered chicken fat and caramelized protein left in the pan after removing the thighs is liquid gold. Building the sauce in the same pan (rather than a separate saucepan) captures all of that flavor. A clean pan makes a thinner, less complex sauce — same ingredients, dramatically different depth.
5. Taste and adjust before the chicken goes back in.
Once the sauce has thickened, taste it before returning the chicken. This is your moment to adjust — more honey if it’s too sharp, a drop more vinegar if it’s too sweet, a splash of water if it’s too thick. This one extra step separates a recipe-follower from a real cook.
Recipe Summary
These sautéed honey garlic chicken thighs are a 30-minute, one-pan dinner that delivers golden, crackling-skinned chicken coated in a sticky, savory-sweet glaze that’s built entirely in the same skillet. The sauté method is the key — high heat, rendered fat, and the fond from the chicken create a sauce with real depth that you simply can’t replicate any other way. Serve over rice, noodles, or vegetables and watch the pan disappear.
Conclusion
If you’ve been searching for a weeknight chicken recipe that’s genuinely worth making again — one that doesn’t sacrifice flavor for speed or require a long list of specialty ingredients — these honey garlic chicken thighs are it. The stovetop sauté method means you get a restaurant-quality, crackling-skinned result in about 30 minutes, with a glossy, caramelized glaze that makes the whole dish taste like you put in far more effort than you did. Make it once, and it becomes a regular. Serve it with rice, noodles, or whatever you have on hand — just make sure to scoop every last drop of that sauce. For more easy, reliable weeknight dinners, check out Best Cheesy Tater Tot Casserole — Easy 5-Ingredient Bake.
Best 30-Minute Honey Garlic Chicken Thighs (Ultimate Recipe)
Description
There are weeknight dinners you settle for, and then there are weeknight dinners you actually look forward to making. Honey garlic chicken thighs fall firmly in the second category. These are the thighs that hit the skillet with a satisfying sizzle, caramelize into a glossy, amber-colored glaze, and fill your kitchen with an aroma that brings everyone to the table before you've even called them. Sautéed on the stovetop in a single skillet, they're done in about 30 minutes from start to finish — no oven required, no fuss. Whether you're cooking for two on a Tuesday or feeding a hungry family, this recipe is the kind of reliable, crowd-pleasing weeknight hero that earns a permanent spot in your regular rotation.
Ingredients
Instructions
-
Step-by-Step Instructions
-
Step 1: Dry and Season the Chicken
-
Pat the chicken thighs completely dry with paper towels — and don't skip this step. Moisture on the skin creates steam in the pan, which is the enemy of a good sear. Combine the salt, pepper, and garlic powder in a small bowl, then season both sides of each thigh generously. Set them aside at room temperature while you prep the sauce — about 5 to 10 minutes at room temperature helps them cook more evenly.
-
Step 2: Mix the Honey Garlic Sauce
-
In a small bowl, whisk together the honey, soy sauce, and apple cider vinegar until combined. In a separate tiny cup, stir the cornstarch and cold water together until the cornstarch is fully dissolved — this is your slurry, and it's what gives the sauce its glossy, clingy texture. Set both aside within arm's reach of the stove before the chicken goes in, because once sautéing starts, things move quickly.
-
💡 Embedded Tip: Mince the garlic right before cooking — pre-minced jarred garlic lacks the sharp, pungent oils that make this sauce sing. Freshly minced is worth the extra two minutes.
-
Step 3: Sear the Chicken Skin-Side Down
-
Heat 1 tablespoon of oil in a 12-inch skillet over medium-high heat until the oil shimmers and just begins to send up a faint wisp of smoke — this usually takes about 1½ to 2 minutes. Place the seasoned thighs skin-side down in the hot pan, pressing each one gently with the tongs to make full contact with the surface. You should hear an immediate, assertive sizzle the moment each thigh hits the pan — if you don't, your pan isn't hot enough. Cook undisturbed for 8 to 9 minutes, until the skin is deep golden-brown and releases naturally from the pan without sticking.
-
💡 Embedded Tip: Resist the urge to lift, peek, or press the chicken during those first 8 minutes. The skin needs uninterrupted contact with the hot surface to render its fat and develop that crackling, golden crust.
-
Step 4: Flip and Cook the Second Side
-
Using tongs, flip each thigh to the meat side. The skin should be a rich, mahogany-gold color with visibly rendered, crispy edges. Reduce the heat slightly to medium and cook for another 7 to 8 minutes, until the thickest part of each thigh registers 165°F on an instant-read thermometer. The USDA recommends this as the safe minimum internal temperature for all poultry — for more on safe poultry handling and temperatures, see the USDA's official poultry cooking guidelines.
-
Step 5: Build the Honey Garlic Sauce
-
Transfer the cooked thighs to a plate and tent loosely with foil. Reduce the pan heat to medium-low and carefully pour off all but about 1 tablespoon of the rendered fat. Add the minced garlic to the pan and sauté for 30 to 45 seconds, stirring constantly with a wooden spoon, until the garlic is fragrant and just starting to turn light golden — watch it closely, because garlic burns fast in a hot pan and bitter, scorched garlic will ruin the sauce. Pour in the honey-soy-vinegar mixture and stir, scraping up any browned bits from the bottom of the pan.
-
Step 6: Thicken and Glaze
-
Let the sauce come to a gentle simmer and bubble for 1 to 2 minutes, then pour in the cornstarch slurry while stirring continuously. The sauce will visibly thicken within 30 to 45 seconds, shifting from thin and watery to a glossy, syrup-like consistency that coats the back of a spoon. Return the chicken thighs to the pan, skin-side up, and spoon the glaze generously over the top. Cook for another 1 to 2 minutes, basting constantly, until the sauce has reduced slightly and clings to every surface of the chicken. Garnish with sesame seeds and scallions, and serve immediately.
Nutrition Facts
Servings 4
- Amount Per Serving
- Calories 390kcal
- % Daily Value *
- Total Fat 22g34%
- Saturated Fat 6g30%
- Protein 26g52%
* Percent Daily Values are based on a 2,000 calorie diet. Your daily value may be higher or lower depending on your calorie needs.