
A Dessert That Looks Fancy But Comes Together Fast
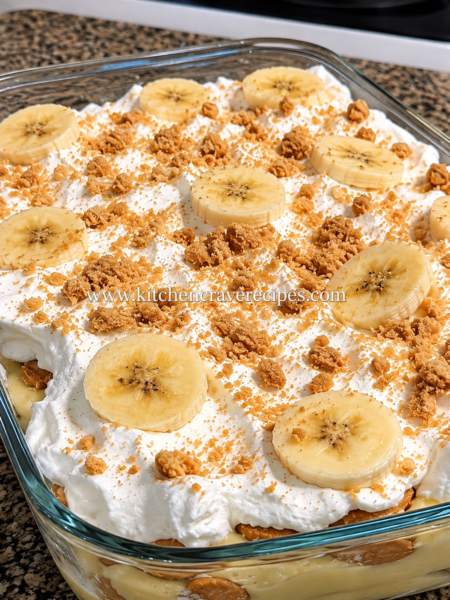
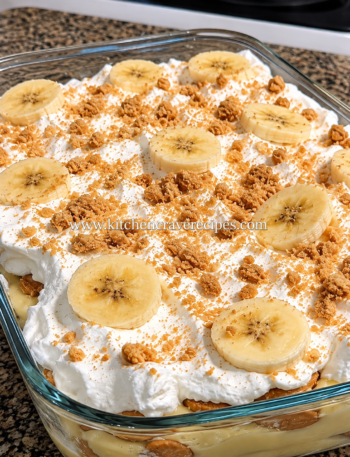
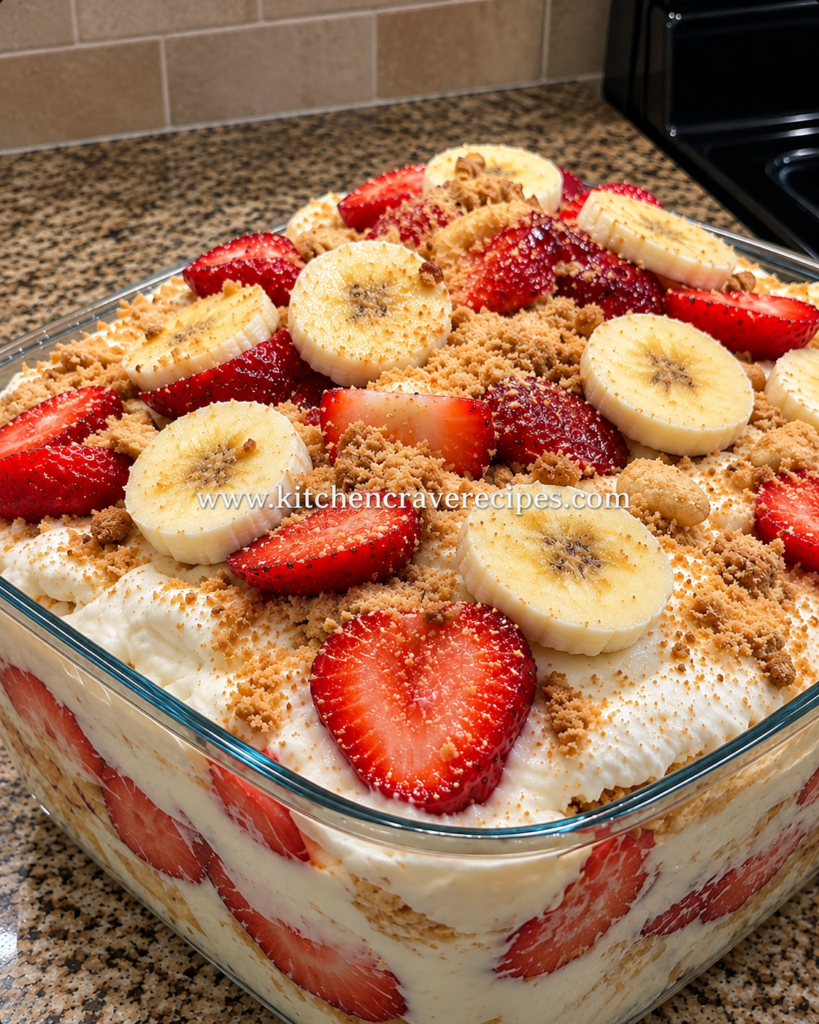
The first time I made this strawberry banana creamy dessert, it disappeared before I even set the serving spoon down. There’s something almost unfair about how gorgeous it looks — layers of silky simmered vanilla custard, ripe banana rounds, juicy sliced strawberries, and crisp graham cracker sheets stacked inside a clear glass dish and finished with a shower of golden crumbs. It looks like it took hours. It didn’t.
What makes this version different from a basic banana pudding is the custard base. Instead of reaching for an instant packet, we simmer a real vanilla cream on the stovetop — just a few minutes of gentle heat, a whisk, and patience — and the result is a velvety, rich layer that store-bought simply can’t replicate. Folded with whipped cream and layered with fresh fruit, this strawberry banana creamy dessert becomes something genuinely special. Whether you’re bringing it to a potluck, building a weeknight dessert that impresses, or just leaning into strawberry season the right way, this recipe delivers every single time.
Recipe Quick Info
| Detail | Info |
|---|---|
| Prep Time | 20 minutes |
| Cook Time | 10 minutes |
| Chill Time | 30 minutes |
| Total Time | 1 hour |
| Servings | 10–12 |
| Cuisine | American |
| Course | Dessert |
| Cooking Method | Simmering |
| Calories | ~310 per serving |
| Difficulty | Standard |
Why You’ll Love This Strawberry Banana Creamy Dessert
- Real simmered custard takes the flavor from good to unforgettable — two extra minutes on the stovetop makes all the difference in richness and depth.
- No oven required — the custard simmers gently on the stovetop, making this completely oven-free and perfect for warm-weather gatherings.
- Feeds a crowd without breaking the bank — simple, affordable ingredients stretch beautifully across 10 to 12 generous servings in one dish.
- Stunning layers with zero decorating skill needed — the clear glass dish does all the visual work; just scoop and layer.
- Endlessly adaptable — swap strawberries for raspberries, use coconut milk for a dairy-free twist, or add a caramel drizzle between layers.
- Make-ahead friendly — the whole dessert can be assembled up to 24 hours in advance and chilled, so your day-of effort is essentially zero.
- Kid and adult approved — clean, familiar flavors that feel nostalgic and indulgent without being over-the-top sweet.
Ingredients
For the Simmered Vanilla Custard
- ⅓ cup granulated sugar
- 3 tablespoons cornstarch
- ¼ teaspoon fine salt
- 2½ cups whole milk
- 3 large egg yolks
- 2 tablespoons unsalted butter
- 1½ teaspoons pure vanilla extract
For the Whipped Cream Layer
- 1½ cups heavy whipping cream, very cold
- 3 tablespoons powdered sugar
- 1 teaspoon pure vanilla extract
For the Layers
- 1 box (14.4 oz) graham crackers (approximately 3 sleeves)
- 2 cups fresh strawberries, hulled and sliced
- 3 medium ripe bananas, sliced into ¼-inch rounds
For the Topping
- ½ cup graham cracker crumbs (crushed from same box)
- Sliced strawberries and banana rounds for garnish
Optional Add-Ins
- 2 tablespoons strawberry jam, warmed (stir into sliced strawberries for extra gloss)
- ¼ teaspoon cinnamon mixed into the crumb topping
- Drizzle of honey or caramel sauce over the finished top
Substitution Guide
| Original Ingredient | Substitution | Notes |
|---|---|---|
| Whole milk | 2% milk or full-fat oat milk | Oat milk produces a slightly thinner custard |
| Heavy whipping cream | Coconut cream (chilled) | Shake can, scoop solidified top; whips beautifully |
| Butter | Vegan butter or coconut oil | Coconut oil adds a subtle tropical note |
| Egg yolks | 3 tablespoons cornstarch only (increase to 4 tbsp) | Custard will be slightly less rich but still sets |
| Graham crackers | Vanilla wafers or digestive biscuits | Wafers give a softer, more tender layer |
| Granulated sugar | Coconut sugar | Adds a light caramel undertone to the custard |
Kitchen Tools Needed
Because the custard layer relies on simmering, having the right stovetop equipment matters — don’t skip the heavy-bottomed pan here.
- Medium heavy-bottomed saucepan (3-quart)
- Balloon whisk
- Rubber spatula
- Heatproof medium bowl (for tempering eggs)
- Fine-mesh strainer (optional but recommended for ultra-smooth custard)
- Stand mixer or hand mixer with whisk attachment (for whipped cream)
- Clear glass square or rectangular baking dish (9×9 or 9×13 inch)
- Cutting board and sharp chef’s knife
- Measuring cups and spoons
- Plastic wrap (for custard cooling)
Step-by-Step Instructions
Step 1: Make the Simmered Vanilla Custard Base (10 minutes)
In your heavy-bottomed saucepan, whisk together the sugar, cornstarch, and salt until evenly combined. Slowly pour in the milk while whisking — this prevents lumps from forming before heat is applied. In a separate small bowl, lightly beat the egg yolks, then stream them into the milk mixture while whisking constantly.
Place the saucepan over medium heat and cook, whisking continuously, until the mixture begins to steam and show small, lazy bubbles around the edges — this is your simmer signal. You’re looking for a gentle simmer, not a rolling boil: a true simmer means you’ll see those small, consistent bubbles breaking the surface slowly, not violently. Do not walk away from the pan. Continue whisking for 3 to 4 more minutes after the simmer begins; the custard will thicken noticeably and coat the back of a spoon.
Embedded Tip: If you see the mixture starting to boil aggressively (big, fast bubbles), immediately reduce heat to low and whisk hard. A hard boil can scramble the egg yolks and create a lumpy custard. Gentle is the goal.
Remove from heat. Stir in the butter and vanilla extract until the butter is fully melted and incorporated. For an extra-silky result, pour the custard through a fine-mesh strainer into a clean bowl. Press plastic wrap directly onto the surface of the custard to prevent a skin from forming, and let it cool for 20 minutes at room temperature.
Step 2: Whip the Cream (5 minutes)
While the custard cools, pour the cold heavy whipping cream into a chilled mixing bowl. Beat on medium-high speed until it begins to thicken, then add the powdered sugar and vanilla extract. Continue beating until stiff peaks form — when you lift the beater, the cream should hold a firm peak that doesn’t droop. Don’t overbeat; stop as soon as the peaks hold their shape.
Embedded Tip: For the fluffiest whipped cream, chill your bowl and beaters in the freezer for 10 minutes before whipping. Fat stays cold longer, and cold fat whips faster and more stably.
Once the custard has cooled to room temperature (it should still be spreadable but not hot), gently fold roughly two-thirds of the whipped cream into the custard using a rubber spatula. Use broad, sweeping under-and-over motions to keep the cream light. Reserve the remaining whipped cream for topping the final layer.
Step 3: Prep the Fruit (5 minutes)
Hull and slice the strawberries about ¼ inch thick — thin enough to layer cleanly but substantial enough to hold texture after chilling. Slice the bananas into ¼-inch rounds just before layering; this minimizes browning. If you’re using the optional warmed strawberry jam, toss the sliced strawberries in it now and set aside.
Step 4: Build the Layers (10 minutes)
This is where your strawberry banana creamy dessert takes shape. Begin with a thin spread of the custard cream on the bottom of your glass dish — just enough to anchor the first cracker layer and prevent sliding.
Layer 1: Lay graham crackers in a single, tight layer over the custard base, breaking crackers as needed to fill gaps. Cover the crackers with roughly one-third of the remaining custard cream, spreading it evenly to the edges.
Layer 2: Arrange a single layer of banana rounds over the custard, followed by a layer of sliced strawberries. Spoon another third of the custard cream over the fruit and smooth gently.
Layer 3: Add another complete layer of graham crackers, pressing lightly so they sit flat. Spread the remaining custard cream on top. Dollop or spread the reserved whipped cream as the final creamy layer.
Step 5: Garnish and Chill (30 minutes minimum)
Arrange fresh banana rounds and sliced strawberries decoratively across the top — refer to the pattern shown in the photo, with alternating banana circles and strawberry halves across the full surface. Scatter the graham cracker crumbs generously over everything for that golden, toasted-looking finish.
Cover the dish loosely with plastic wrap and refrigerate for at least 30 minutes before serving. Chilling firms the custard layers, softens the crackers to a cake-like texture, and lets every flavor settle into one cohesive, creamy bite.
Pro Tips for the Perfect Strawberry Banana Creamy Dessert
Simmer temperature is everything. The most important pro tip for a simmered custard is keeping the heat at a genuine, controlled simmer — medium or medium-low, not medium-high. If the liquid is boiling hard, you’ve gone too far; the egg proteins will seize and the cornstarch can break down, giving you grainy custard instead of silky cream. Keep the bubbles small and steady.
Use very ripe but still firm bananas. Bananas that are too green will be starchy and bland in the layers. Too ripe and they’ll turn brown and mushy within hours. Look for bananas with a few spots — sweet but still holding shape.
Always temper the eggs before adding to hot liquid. Whisk the yolks first in a separate bowl, then slowly stream the hot milk mixture into them a little at a time before returning everything to the pan. This prevents curdling.
Layer crackers edge-to-edge for structure. Gaps in the cracker layer mean collapsed scoops when serving. Break crackers into pieces and puzzle them together tightly.
Make it the night before. This dessert is genuinely better after an overnight rest. The crackers absorb moisture from the custard and become tender and cake-like — the texture improves significantly after 8 hours.
Common Mistakes to Avoid
1. Letting the custard boil instead of simmer.
A rolling boil will scramble your egg yolks and turn smooth custard into a grainy, lumpy mess. Fix: Keep the heat at medium, watch for small gentle bubbles, and whisk constantly once the liquid warms up.
2. Not whisking continuously during simmering.
Walking away from a simmering custard for even 60 seconds allows the bottom to scorch. Fix: Stay at the stove and keep that whisk moving in wide, consistent strokes until the custard thickens.
3. Skipping the plastic wrap directly on the custard.
If you cover the bowl loosely or leave it uncovered while it cools, a thick, rubbery skin will form on the custard surface, which creates lumps when you fold in the cream. Fix: Press plastic wrap flush against the surface the moment the custard comes off the heat.
4. Slicing bananas too early.
Banana rounds begin to oxidize and brown within 15 to 20 minutes of cutting. Fix: Slice them right before you build the layers. A quick toss in ½ teaspoon of lemon juice can also slow browning if you need more prep flexibility.
5. Using warm custard with the whipped cream.
Folding hot or warm custard into whipped cream deflates it immediately and produces a flat, runny layer. Fix: Let the custard cool fully to room temperature — test it by touching the outside of the bowl; it should feel neutral, not warm — before folding.
6. Skimping on the cracker base.
A thin or gappy cracker layer won’t hold structural integrity when you scoop. Fix: Break crackers into pieces and tile them tightly like a mosaic — every square inch of the base should be covered.
7. Serving immediately after assembly.
The layers need chilling time for the custard to set, the crackers to soften, and the flavors to meld. Fix: Build at least 30 minutes into your timeline, or ideally assemble the night before.
Variations
Healthy Version
Swap whole milk for unsweetened almond milk and reduce sugar to ¼ cup. Use coconut whipped cream in place of heavy whipping cream. The custard will be slightly lighter in body but still creamy — increase cornstarch by 1 teaspoon to compensate for the lower fat content of almond milk. Load up on extra fruit layers for natural sweetness.
Vegetarian Version
This recipe is already vegetarian as written. Ensure your graham crackers are certified vegetarian (some brands use gelatin in fortified versions) and you’re set without any changes needed.
Spicy-Tropical Version
Add ¼ teaspoon of cayenne pepper and ½ teaspoon of cinnamon to the simmering custard for a warm, unexpected heat that plays beautifully against the sweet fruit. Swap half the strawberries for fresh mango slices to lean into the tropical angle.
Gluten-Free Version
Replace graham crackers with certified gluten-free graham-style crackers or gluten-free shortbread cookies. Verify cornstarch is labeled gluten-free (most brands are, but cross-contamination can occur). Every other component in this recipe is naturally gluten-free.
Low-Carb / Keto Version
This variation requires a different approach to the cracker layers. Use almond flour shortbread cookies (homemade or store-bought keto-friendly). Sweeten the custard with erythritol or monk fruit sweetener instead of sugar, using the same measurement. Replace cornstarch with 2 teaspoons of glucomannan powder (konjac starch) for thickening — note that glucomannan thickens at lower temperatures, so whisk it in off the heat. Limit banana to half a banana sliced thinly across all layers to reduce carbs.
What to Serve With This Strawberry Banana Creamy Dessert
- Fresh mint tea or iced herbal tea — the brightness cuts through the richness of the custard beautifully.
- Vanilla ice cream — a small scoop alongside a portion doubles down on the creamy dessert experience in the best way.
- Sparkling lemonade or strawberry agua fresca — the acidity and fizz are a natural refresher between bites.
- A drizzle of warm caramel sauce — serve on the side so guests can add as much or as little as they like.
- Toasted coconut flakes — scatter over individual scoops for texture contrast and a subtle tropical note.
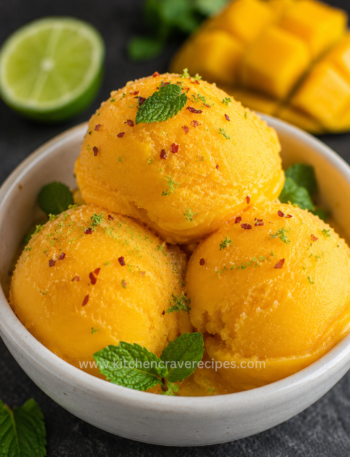
- Creamy Mango Sorbet: 4-Ingredient Easy & Foolproof Recipe at your next spring gathering — it uses the same fresh strawberries and makes a beautiful companion spread.
- Light butter cookies or shortbread — great alongside for extra crunch if you want a little more texture on the plate.
Storage Instructions
Refrigerator
Store the assembled dessert tightly covered with plastic wrap in the refrigerator for up to 3 days. The crackers will continue to soften over time, which most people actually prefer. The bananas may darken slightly at the edges by day two — this is cosmetic only and doesn’t affect flavor.
Freezer
This dessert is not recommended for freezing once assembled. The custard layer will separate upon thawing, the fruit will release excess water, and the graham crackers will become soggy and lose structure. If you’d like to freeze components, the simmered custard (before whipped cream is folded in) can be frozen in an airtight container for up to 1 month; thaw overnight in the refrigerator and re-whisk before use.
Shelf Life Summary
| Storage Location | Duration | Notes |
|---|---|---|
| Refrigerator (assembled) | Up to 3 days | Cover tightly; flavor improves day 2 |
| Refrigerator (custard only) | Up to 4 days | Store separately with plastic wrap on surface |
| Freezer (assembled) | Not recommended | Texture degrades significantly |
| Freezer (custard only) | Up to 1 month | Thaw overnight; re-whisk before using |
Reheating Instructions
This is a chilled dessert and is meant to be served cold — do not reheat the assembled dish. However, if your simmered custard has been stored separately and you want to warm it slightly before layering, here’s how:
Stovetop: Pour the refrigerated custard into a small heavy-bottomed saucepan over low heat. Stir gently and continuously for 3 to 4 minutes until it reaches a pourable, spreadable consistency. Do not let it simmer again — just warm it enough to loosen. Per the USDA food safety guidelines, previously cooked custard with egg yolks should be reheated to at least 165°F if it’s been stored for more than 2 days.
Microwave (custard only): Transfer to a microwave-safe bowl and heat in 15-second intervals on 50% power, stirring between each, until spreadable. Total time is usually 45 to 60 seconds. This method carries a higher risk of uneven heating and scorching the bottom — stir thoroughly between intervals.
Nutrition Facts
(Per serving, based on 12 servings — values are estimates)
| Nutrient | Amount |
|---|---|
| Calories | ~310 |
| Total Fat | 16g |
| Saturated Fat | 9g |
| Cholesterol | 90mg |
| Sodium | 180mg |
| Total Carbohydrates | 38g |
| Dietary Fiber | 1.5g |
| Total Sugars | 22g |
| Protein | 5g |
| Vitamin C | 18% DV |
| Calcium | 12% DV |
| Iron | 6% DV |
Nutrition Disclaimer: These values are calculated estimates based on standard ingredient amounts and may vary depending on specific brands, substitutions, or serving size. For precise dietary information, use a certified nutrition calculator with your exact ingredients. This information is provided for general reference only and is not intended as medical or dietary advice. For guidance on dietary needs, consult a registered dietitian or visit nutrition.gov.
Frequently Asked Questions
What is a strawberry banana creamy dessert?
It’s a layered, no-bake-style dessert featuring alternating layers of graham crackers, simmered vanilla custard cream, fresh strawberries, and banana slices — assembled in a glass dish and chilled until the crackers soften and the layers set together into one creamy, cohesive dessert.
Can I use instant pudding instead of simmering a custard from scratch?
Yes, you can substitute one box of instant vanilla pudding prepared according to package directions. However, the simmered custard is noticeably richer and less sweet-in-a-processed-way — it’s worth the extra 10 minutes if you have them.
Why do I need to simmer the custard instead of just mixing the ingredients cold?
Heat is what activates the cornstarch and cooks the egg yolks so they thicken properly. Without simmering, the custard will remain liquid and won’t hold its shape between layers, causing the dessert to collapse when scooped.
How do I keep the bananas from turning brown?
Slice them right before layering to minimize exposure to air. You can also toss the slices briefly in ½ teaspoon of fresh lemon juice, which slows oxidation without noticeably affecting the flavor inside the layers.
Can I make this strawberry banana creamy dessert the day before serving?
Absolutely — and it’s encouraged. An overnight rest in the refrigerator allows the crackers to fully absorb moisture and become tender, the custard to firm up perfectly, and all the flavors to meld together. Many people think it tastes even better on day two.
What size dish works best for this recipe?
A 9×9-inch square glass dish works well for a taller, more dramatic layer structure. A 9×13-inch dish will give you slightly thinner layers but feeds more people and makes serving easier for large groups. A clear glass dish is ideal so the layers are visible from the side.
Can I use frozen strawberries instead of fresh?
Fresh strawberries are strongly recommended here because frozen ones release significant water as they thaw, making the custard layers watery and the crackers overly soggy. If fresh aren’t available, thaw frozen berries completely and drain them thoroughly on paper towels before using.
Is there a dairy-free version of this dessert?
Yes — use full-fat coconut milk in place of whole milk for the custard (stir before measuring as it separates), chilled coconut cream whipped in place of heavy whipping cream, and dairy-free vegan butter. The custard will have a light coconut undertone that actually pairs beautifully with the strawberry and banana flavors.
How long does this dessert need to chill before it’s ready to serve?
A minimum of 30 minutes is needed for the layers to begin setting. For the best texture and clean scoops, aim for 2 to 4 hours. Overnight is ideal if you’re planning ahead.
Why is my custard lumpy after simmering?
Lumpy custard usually means the heat was too high (the eggs scrambled slightly) or the mixture wasn’t whisked continuously during cooking. If it’s only slightly lumpy, strain it through a fine-mesh sieve while it’s still warm — this smooths out most small lumps effectively.
Can I add a chocolate layer to this dessert?
Yes — a thin drizzle of warm chocolate ganache or a layer of chocolate pudding between the second and third cracker layers adds a delicious contrast. Keep it thin so it doesn’t overwhelm the fruit flavors.
Can I double this recipe for a larger crowd?
Yes, doubling works well. Use a deep 9×13 dish or two separate 9×9 dishes. When doubling the simmered custard, use a larger (4–5 quart) saucepan to ensure even heat distribution and allow more room for whisking without splashing.
Expert Chef Tips
Toast your graham cracker crumbs for the topping. Spread the crumbs on a dry skillet over medium-low heat and stir for 2 to 3 minutes until golden and fragrant. This tiny step adds a nutty, caramelized depth to the garnish that you’ll notice immediately — and it mimics the toasted flavor you’d get from a baked crust without turning on the oven.
Temper your eggs before the custard goes onto the heat. Even though this recipe adds egg yolks to the cold milk mixture before heating, give the yolks an extra moment — whisk them vigorously until slightly pale before adding. This creates a more emulsified, stable custard that simmers smoothly without any scrambling risk.
Layer fruit in shingles, not piles. Instead of placing strawberry slices flat and stacked randomly, fan them in overlapping shingles like roof tiles. This distributes them more evenly across every scoop and creates a more dramatic cross-section when the dish is viewed from the side.
Keep your custard at a dead simmer, not a boil. Set a visual target: you want lazy bubbles breaking the surface every second or two — like a gentle spring — not the aggressive rolling boil of a pasta pot. If you ever see rapid bubbling, drop the heat immediately. Temperature control here is the single biggest factor between a silky, professional-quality result and a grainy, broken one.
Chill the serving spoon before scooping. Run your serving spoon under cold water and chill it in the freezer for 5 minutes before portioning. Cold utensils slice through chilled custard layers cleanly and produce tidy, layered scoops that look as good as the dish tastes.
Recipe Summary
This strawberry banana creamy dessert layers simmered-from-scratch vanilla custard with fresh strawberries, banana rounds, and honey-golden graham crackers, finished with clouds of whipped cream and a scatter of toasted crumbs. The custard is made by gently simmering whole milk, egg yolks, and cornstarch on the stovetop until thick and silky, then folded with whipped cream for a lighter, mousse-like texture. Assembly takes about 10 minutes, and a 30-minute chill (or overnight rest) does the rest of the work. The result is a dessert that looks stunning in the dish and tastes even better than it looks.
Bring This to the Table — They’ll Ask for the Recipe Every Time
There’s a reason layered cream desserts have stayed on tables across the country — they’re approachable, sharable, and deeply satisfying in a way that fussy, over-engineered sweets rarely are. But this particular version, built around a proper simmered custard and loaded with fresh fruit, earns every compliment it gets.
This strawberry banana creamy dessert is the kind of thing that becomes your signature dish — the one you show up with to every summer gathering, the one people request by name. Make it once and you’ll understand why. Now go simmer that custard, slice those strawberries, and build yourself something worth sharing.
Easy 5-Layer Strawberry Banana Creamy Dessert (Ultimate Guide)
Description
The first time I made this strawberry banana creamy dessert, it disappeared before I even set the serving spoon down. There's something almost unfair about how gorgeous it looks — layers of silky simmered vanilla custard, ripe banana rounds, juicy sliced strawberries, and crisp graham cracker sheets stacked inside a clear glass dish and finished with a shower of golden crumbs. It looks like it took hours. It didn't.
Ingredients
Instructions
-
Step 1: Make the Simmered Vanilla Custard Base (10 minutes)
-
In your heavy-bottomed saucepan, whisk together the sugar, cornstarch, and salt until evenly combined. Slowly pour in the milk while whisking — this prevents lumps from forming before heat is applied. In a separate small bowl, lightly beat the egg yolks, then stream them into the milk mixture while whisking constantly.
-
Place the saucepan over medium heat and cook, whisking continuously, until the mixture begins to steam and show small, lazy bubbles around the edges — this is your simmer signal. You're looking for a gentle simmer, not a rolling boil: a true simmer means you'll see those small, consistent bubbles breaking the surface slowly, not violently. Do not walk away from the pan. Continue whisking for 3 to 4 more minutes after the simmer begins; the custard will thicken noticeably and coat the back of a spoon.
-
Embedded Tip: If you see the mixture starting to boil aggressively (big, fast bubbles), immediately reduce heat to low and whisk hard. A hard boil can scramble the egg yolks and create a lumpy custard. Gentle is the goal.
-
Remove from heat. Stir in the butter and vanilla extract until the butter is fully melted and incorporated. For an extra-silky result, pour the custard through a fine-mesh strainer into a clean bowl. Press plastic wrap directly onto the surface of the custard to prevent a skin from forming, and let it cool for 20 minutes at room temperature.
-
Step 2: Whip the Cream (5 minutes)
-
While the custard cools, pour the cold heavy whipping cream into a chilled mixing bowl. Beat on medium-high speed until it begins to thicken, then add the powdered sugar and vanilla extract. Continue beating until stiff peaks form — when you lift the beater, the cream should hold a firm peak that doesn't droop. Don't overbeat; stop as soon as the peaks hold their shape.
-
Embedded Tip: For the fluffiest whipped cream, chill your bowl and beaters in the freezer for 10 minutes before whipping. Fat stays cold longer, and cold fat whips faster and more stably.
-
Once the custard has cooled to room temperature (it should still be spreadable but not hot), gently fold roughly two-thirds of the whipped cream into the custard using a rubber spatula. Use broad, sweeping under-and-over motions to keep the cream light. Reserve the remaining whipped cream for topping the final layer.
-
Step 3: Prep the Fruit (5 minutes)
-
Hull and slice the strawberries about ¼ inch thick — thin enough to layer cleanly but substantial enough to hold texture after chilling. Slice the bananas into ¼-inch rounds just before layering; this minimizes browning. If you're using the optional warmed strawberry jam, toss the sliced strawberries in it now and set aside.
-
Step 4: Build the Layers (10 minutes)
-
This is where your strawberry banana creamy dessert takes shape. Begin with a thin spread of the custard cream on the bottom of your glass dish — just enough to anchor the first cracker layer and prevent sliding.
-
Layer 1: Lay graham crackers in a single, tight layer over the custard base, breaking crackers as needed to fill gaps. Cover the crackers with roughly one-third of the remaining custard cream, spreading it evenly to the edges.
-
Layer 2: Arrange a single layer of banana rounds over the custard, followed by a layer of sliced strawberries. Spoon another third of the custard cream over the fruit and smooth gently.
-
Layer 3: Add another complete layer of graham crackers, pressing lightly so they sit flat. Spread the remaining custard cream on top. Dollop or spread the reserved whipped cream as the final creamy layer.
-
Step 5: Garnish and Chill (30 minutes minimum)
-
Arrange fresh banana rounds and sliced strawberries decoratively across the top — refer to the pattern shown in the photo, with alternating banana circles and strawberry halves across the full surface. Scatter the graham cracker crumbs generously over everything for that golden, toasted-looking finish.
-
Cover the dish loosely with plastic wrap and refrigerate for at least 30 minutes before serving. Chilling firms the custard layers, softens the crackers to a cake-like texture, and lets every flavor settle into one cohesive, creamy bite.
Nutrition Facts
Servings 10
- Amount Per Serving
- Calories 310kcal
- % Daily Value *
- Total Fat 16g25%
- Saturated Fat 9g45%
- Protein 5g10%
* Percent Daily Values are based on a 2,000 calorie diet. Your daily value may be higher or lower depending on your calorie needs.